

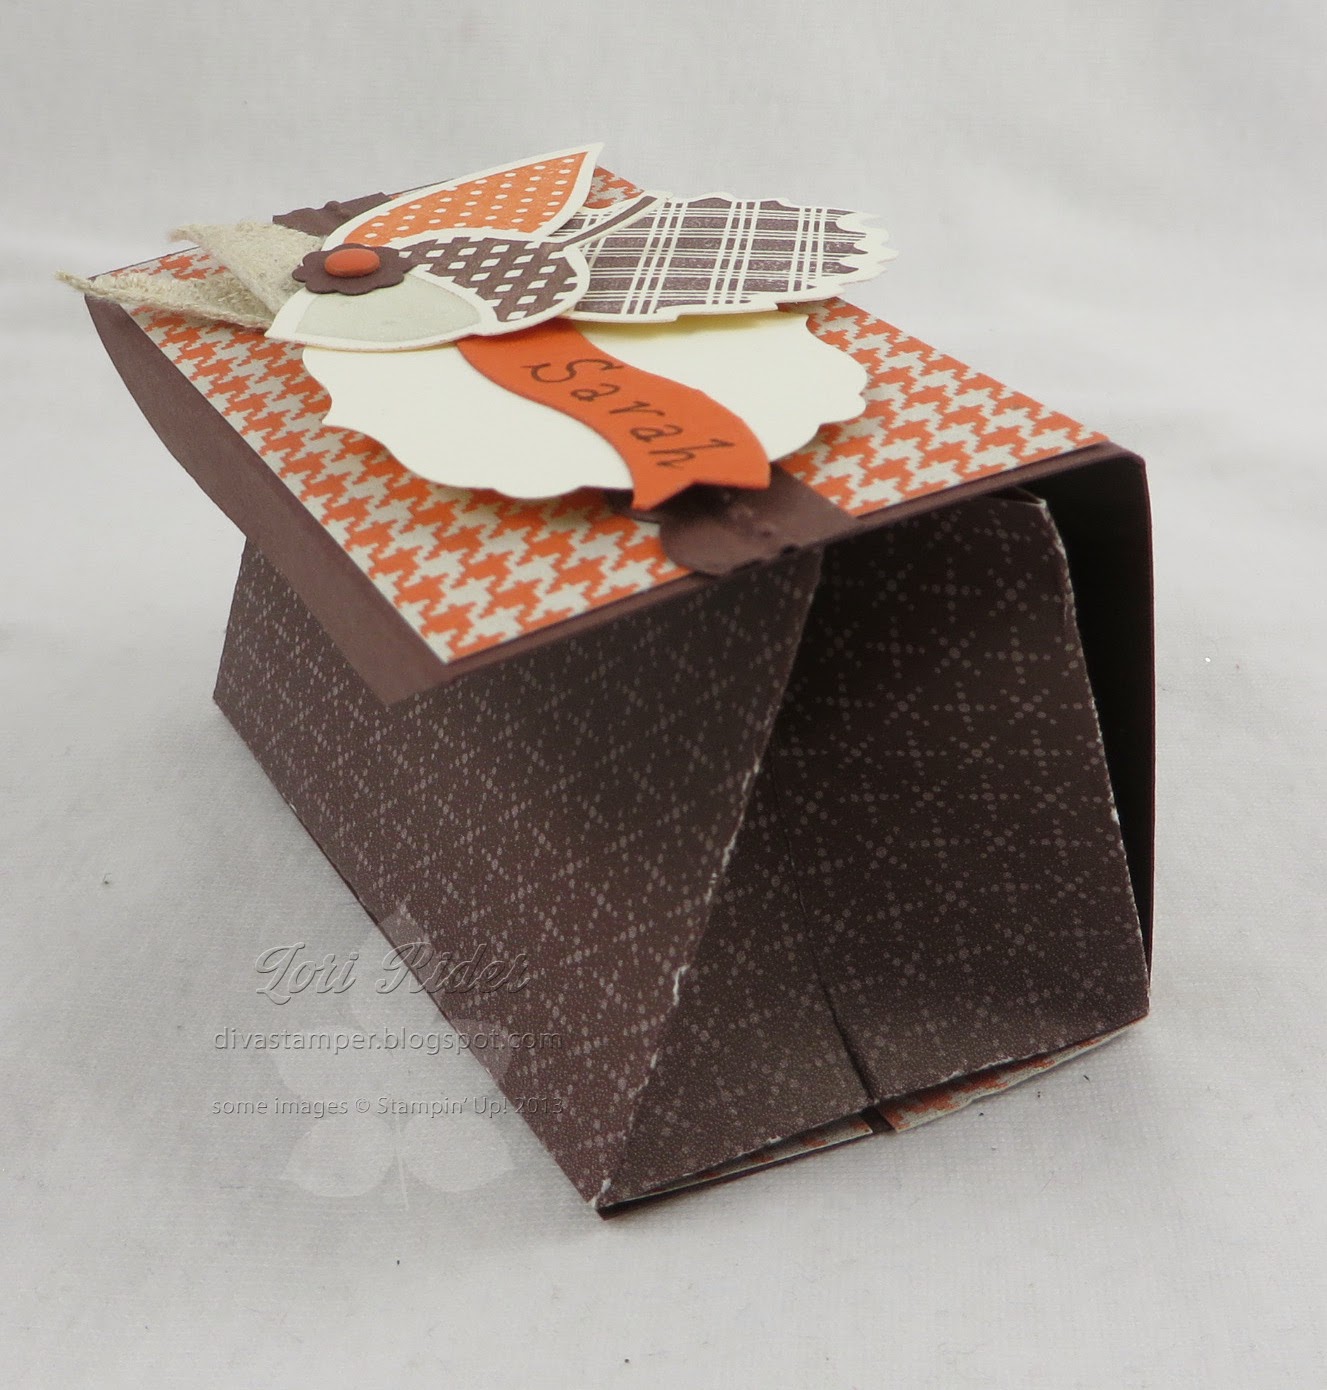
You can't really tell from the photo but when it's closed it's shaped like a triangle, then you open it to reveal the little treat bag on the inside. Granted, it won't hold a HUGE treat, but it's Thanksgiving so do you really need that much more to eat? ;)

I took some photos as I made this project so you can see how I did it. You need a piece of designer paper 3" x 12". I recommend that the inside be a light color so you can see the score lines more easily. First, score it on the long side at 1", 4 1/2", 5 1/2", 6 1/2", 10", and 11". Rotate 90 degrees to the right and score on the short side at 1". Fold on all score lines and snip for flaps at the 1", 4 1/2", 6 1/2", and 10" score lines.

Turn the paper over and put sticky tape on the flaps as shown. NOTE: on the side flap, where I put a single strip of tape, you will want to add another strip next to the score line. Otherwise the side won't stay closed.
Peel off the backing from the tape and begin to assemble your bag. Start with the side that's on the left in the above photo.
The other side is a bit trickier. First fold in the 1" x 2" flap, then fold the last flap over top and seal all the edges. It will help to reach inside with a bone folder and go over all the tape.

Line up the tape with the bottom of your designer paper bag. The score lines on the sides of the bag will fold in to make gussets when you close the box.
Tuck the flap under the bottom to close. Note that the more you tuck and untuck the flap, the less tightly it will close, so you may not want to handle it any more than necessary.

Now you can decorate the front! I used Sweater Weather designer paper and the Wonderfall stamp set. I put my daughter's name on this one and now she wants to take it away from me - I guess it gets her "stamp" of approval, LOL! I hope you'll try out this project and show me what you come up with!
3 comments:
What an adorable project! Placeholder AND treat favor in one--clever! Love the way you've finished it with the sweater weather paper and colors. Thank you for joining us at The Paper Players!
I am completely smitten with treat bag/place card!!! The leaves and acorn are beautiful!
Oh this is so cute, I can picture this at my dining table for Thanksgiving. Thanks for sharing the directions, and thanks for joining us this week at The Paper Players, Lori!
Post a Comment