Saturday, October 10, 2009

Season of Christmas

I don't know about you but suddenly it's hitting me how soon it's going to be Christmas. I have hardly started making Christmas cards, so when I sat down to do my card for the OCC sketch challenge, I decided it had better be for Christmas.

First of all, you may be saying, "Lori came up with a sketch challenge?" I know - not really my specialty! But I knew that the OCC players like them and we hadn't done one in a few weeks. I came up with the sketch based on this card (for the OCC purposes it's simplified just a bit).

Looking through my Christmas stamps, I decided that Season of Joy would look good with this layout, if I made a row of trees. This stamp set is not new, but it's new to me, and I love it! I based my colors (real red, old olive, very vanilla) around this set of Christmas paper - which is from two years ago! I recently found a huge stash of SU Christmas paper that I plan to use for lots of Christmas cards this year.

I first stamped the tree twice, leaving room in between, then stamped the third tree, cut it out, and added some red Galaxy glitter. The word panel was made with the large stamp from this set, stamped multiple times with the Stamp-a-ma-Jig. I fiddled with the sketch a little because I wanted more of those fun words to show - I even slid the olive layer in between the vanilla layer and its red background, just to be different!

The sentiment comes from the same set, and I used my favorite oval punches. I covered the snowflake in "JOY" with a punched poinsettia, which I also gave the glitter treatment. The upper right corner needed something, so I stamped and cut out the poinsettia, added glitter to the berries, and placed it on top of a bow made from the olive Mistletoe ribbon that's in the mini catalog.

I hope you'll come and play along with the sketch challenge - I can't wait to see your creations!

Saturday, October 3, 2009

More inspiration

Have you had enough inspiration challenges from me yet? I promise, this is the last one, LOL.

I had one card left to make for the Card Buffet and I was really struggling with what I wanted to do. I knew it was going to be a birthday card but I couldn't seem to move forward. Lucky for me, I had the SCS inspiration challenge to turn to. Steph picked - for the 200th challenge! wow! - the site Kir DeVries. What a fun site to browse! I picked this In the Ground water bottle.

I started my card with the Cheep Talk branch, stamped with close to cocoa and certainly celery markers. Then I added a ruby red bird (not quite a squirrel, but I have no squirrel stamps) and little flowers punched from blush blossom and ruby red. These are made with the trio flower punch that's one of the Deals of the Week - a great punch to have in your collection. The sentiment is from Teeny Tiny Wishes.

The background is a panel of dot paper from the current Patterns Pack (hostess level 1) embellished with celery wide grosgrain ribbon and a chipboard flower. I embossed the flower using blush blossom craft ink and clear EP, then added a Sherbet celery button threaded with a tiny strip of ruby red cardstock.

OK, I'm officially done prepping cards for tomorrow. I'll try to post some of the others as I get time. It's going to be a fun event - I can't wait!

I'm not ready for cold weather

Brr, the chilly fall temperatures have arrived in Massachusetts and I'm not enjoying it much! Maybe that's why I made such a springy card for this week's challenge at Our Creative Corner. This is going to be a fun month for me because I am the hostess for the five challenges in October. I hope you'll come and play - I think I have some good stuff in store!


The challenge this week is my favorite kind - an inspiration challenge. I know you are shocked! I chose these journals by Monique Duval because I loved the style and the words on the front.


For my card I wanted to make something pretty. I took the colors from the green journal and used old olive, pink pirouette, and chocolate chip, with naturals ivory cardstock for the base and the image. The dogwood from Soft Summer was stamped in chocolate chip and then watercolored using ink pads and an Aqua Painter. I made the background by stamping one of the Park Avenue Patterns stamps in chocolate chip, using the Stamp-a-ma-Jig for placement, and I sponged lots of chocolate chip ink on the edges. To give the dogwood image an overall smaller footprint and show more of the background, I used the out of the box technique when cutting it out.

To finish, I added a chocolate chip bow and a sentiment from Best Yet, inside the frame from Great Friend. The sentiment is a faux tag, thanks to a little hemp twine. The outer edges seemed to need something behind the olive panel, so I cut the ends of the Top Note die with chocolate chip scraps and adhered them to the sides. Then I threaded two pink buttons with more hemp twine and added them in the corner.

There you have it - I've kicked off the October challenges and we're ready to see what you come up with! Please visit the OCC blog and check out all the wonderful samples from our fabulous team, and then make your own! Thanks so much for stopping by!

Friday, October 2, 2009

Eat, Drink & Be Scary


Here's another card for my Card Buffet on Sunday. I had this idea to make a bat out of punches a while ago, and I finally got a chance to use it. It's very simple - the wings are ovals (I used the wide oval) and the head is a 1" circle. To make the wing shapes, I used the same circle punch to cut into the wings. It's very forgiving - if you don't like the shape the first time, you can usually fix it. Then I just attached the wings to the head and added eyes with white gel pen.

I stamped the background with the Baroque Motifs swirl, then put the rest of the card together with Taylor's sketch challenge for today. The paper is from the Night and Day specialty pack, and the sentiment is from Eat, Drink & Be Scary - colored with marker since I wanted a circle instead of a tag. I added white dots with the gel pen and a bit of black grosgrain ribbon.

I'm looking forward to having people over to stamp on Sunday - the cards are going to be lots of fun, so if you're local it's not too late to RSVP!

Thursday, October 1, 2009

Divine Diva Inspiration Challenge #13


Wow, it's October, and we're on our 13th challenge! Today we have some artwork by Jo Moulton, which I found at art.com - I loved the rich fall colors and the distressed look of this piece.


When it came time to make my card, I kept things simple because (1) I'm pressed for time and (2) I wanted to make my first card for this weekend's Card Buffet. We will be making cards for 10 different occasions, and this is the sympathy card.

Now that I'm looking at the inspiration piece again, it looks much more green than my card. Well, I wanted to use In Colors, and in my memory the yellow color stood out more than the green. So there you go! I first cut a piece of cardboard (the backing from the designer paper packs, which is my favorite cardboard) with the scallop square die, then used it as a mask over a 5" square of whisper white. I sponged crushed curry around the edge, leaving the white scalloped square in the center. Of course you could just cut out the scallop square from white cardstock and put it over a larger curry square, but my goal here is to minimize layers and keep the cards quicker than my usual.

The image from Lovely as a Tree was colored with crushed curry, dusty durango and soft suede markers. Then I added the sentiment from Close as a Memory in durango. I wanted to bring the lovely flourish from the artwork into my card somehow, so I cut out the Tulipe die with soft suede and just used two pieces of it, held together with a 5/16" white brad and adhered with a pop-up glue dot.

Be sure to check out the cards made by all the Divine Divas for this challenge!

Anne

Chris

Donna

Julie

Keri

Kerri

Hope you are inspired to come and play along. Just leave a comment here with a link to your card. We can't wait to see what you create! The keyword for uploading on SCS will be DDIC13. Have fun and look for the next challenge on October 15!

Saturday, September 26, 2009

Snowflake Pines


Welcome to another fun challenge from Our Creative Corner! This week we are making monochromatic cards (one color plus neutrals of choice). I decided to use one of my favorite colors - blue - which oddly enough I haven't used yet on an OCC card. I'm also breaking out several products from the holiday mini for the first time. This was fun, fun, fun!

I started out by stamping the trees from Patterned Pines (one of the hostess sets you can earn from the mini) with Versamark on night of navy cardstock and white embossing. I used white and bashful blue layers and the ticket corner punch. The background is embossed with the Petals-a-Plenty folder, and for embellishments over the background I used white satin ribbon and silver cord. The sentiment is from Teeny Tiny Wishes (this is becoming my go-to sentiment set) and punched with word window and modern label punches.

I want to highlight my snowflake with a little mini tutorial. I really wanted to layer my snowflake (punched with the new snowflake punch) with both white and bashful blue, so I started playing around just to see what I can come up with. Here is a mini tutorial of what I did.

1. Punch the base snowflake (mine is whisper white) and set it aside.

2. Punch the snowflake you're going to layer on top (mine is bashful blue).

3. Snip off the larger of the "prongs" on each arm of the snowflake.

4. Cut each arm off at desired length (more on the length in a minute).

5. Using any glue pen (I used two-way glue), adhere the layered arms on top of the base arms. Here you can see where I made my cuts. Cut them longer first and see where you want them - if they are too short then the snowflake prongs overlap.

6. Place a small punched circle (mine is 3/4") on the back of your snowflake. This makes the snowflake more stable and also gives you something to put your brad through. I used navy cardstock so it would blend into the background.

7. Put a large brad (mine is a filigree brad) through the center and attach to your project. (Sorry for the slightly blurry photo of my finished snowflake!)

Here is another variation: you can leave a little more of the original snowflake and adhere directly over the base. This gives more of a two-tone look than a layered look. I actually made this one first but ended up using the layered one. I think they are both very cool, though!

OK, that's it from me. Be sure to check out the rest of the OCC team members' samples and prepare to be wowed! We hope you play along this week. Thanks so much for visiting!

Sunday, September 20, 2009

For my dearest husband...

It's that time again - time to make Todd an anniversary card! This year makes #9 for us. I can hardly believe it!

I had to combine my card with a challenge, of course - and the featured stamper challenge gave me the perfect thing. The featured stamper this week is Heather (aka tankgrl) and her gallery is amazing. I had a hard time choosing but found just what I was looking for when I went to the last page of her gallery - this card just called out my name right away.

Instead of using a text background stamp, I used a sheet from the Night & Day specialty paper (in the holiday mini) and stamped the French Filigree background stamp over top in basic black. I know that Todd thinks it's weird when you can read the words in the background, so I'm hoping to distract him from doing that - because if you read the words on this paper, they really are weird. They don't make any sense at all!

For my always artichoke panels I used the retired Juntos paper from the Spanish catalog, and I stamped a second-generation French Filigree onto those as well. My image is from Leaf Lines, and was stamped with black craft ink and embossed with clear EP. I used a sentiment from Short & Sweet and added retired Ribbon Originals black cord ribbon as an embellishment. My brads are faux brads - I decided I wanted to add them after the card was all put together. So I punched the circles with the larger hole on my Crop-a-dile and glued them down.

Saturday, September 19, 2009

Razzleberry Pink


For the OCC this week, our challenge is a color challenge based on this photo. Don't those petit fours look yummy?

I'm not sure why but I had trouble getting started with this challenge - I think the hot pink threw me, LOL. Once I decided to use this DP from Razzleberry Lemonade and the coordinating Razzle Dazzle stamp set, my card came together pretty quickly. For my colors I used melon mambo and pretty in pink, along with chocolate chip and whisper white.

I first colored the "stripe" pattern stamp with markers and used my Stamp-a-ma-Jig to align two impressions of the stamp. (Unfortunately the two images didn't join quite correctly, but a little carefully placed taffeta ribbon took care of that!) I also colored the main image with markers and cut it out with Nestabilities. The sentiment is from the Autumn Harvest rub-ons, and I used 5/16" chocolate chip brads (with the prongs cut off) in the upper left corner. And that's it, really... I can't believe how much time I put into this card that was so simple in the end!

I hope you find these colors inspiring and come play the challenge this week! Be sure you also check out the samples from the rest of the team - they are amazing as always. Thanks for visiting my blog and have a great weekend!

Thursday, September 17, 2009

Divine Diva Inspiration Challenge #12


I'm not sure how the idea popped into my head to do a challenge inspired by a cake. Did someone say cake? Yum.... oh, sorry, back to this week's challenge! There are so many wonderful cake photos out there and it was very hard to choose, but in the end I went with this one from Let Them Eat Cake.


When I sat down to make my card, I knew I was going to use chocolate chip plus some of the retired In Colors, along with the eyelet border punch. Other than that, I didn't have an idea ahead of time. I decided to use the For All You Do stamp set. I clear embossed the stem and flowers with kiwi kiss and riding hood red, then cut them out and assembled them on a baja breeze panel. The center of the flowers are pink pirouette buttons from Button Bouquet, threaded with brown embroidery floss. The sentiment is from Many Happy Returns (retired) and was oval punched and mounted on dimensionals.

When I was working on this card I found a riding hood red panel that I'd embossed with the Cuttlebug birds and swirls folder - for some project or other! I decided to try my trick of heat embossing the dry-embossed panel. (See this post for the tutorial.) Mainly I did this because with the flower having been embossed, the unembossed cardstock didn't look red enough. But I think the clear embossing looks very cool with this CB pattern. I added embellishments from the Hodgepodge Hardware (also retired) copper set and a bit of kiwi ribbon. The card base is pink pirouette with the edge run through the eyelet border punch. All in all I really like this card - although I think it didn't photograph well and it also turned out more pink and less brown than I anticipated! But that's one thing I continue to find fascinating about the artistic process - you never quite know where you're going to end up.

Be sure to check out the cards made by all the Divine Divas for this challenge!

Angela - this is unfortunately Angela's last challenge with us. A big thank-you from me for being such a wonderful DT member!

Anne

Chris

Donna

Julie

Keri

Kerri

Hope you are inspired to come and play along. Just leave a comment here with a link to your card. We can't wait to see what you create! The keyword for uploading on SCS will be DDIC12. Have fun and look for the next challenge on October 1!

Monday, September 14, 2009

Please welcome the newest Divine Divas!

Our team is growing again! We are saying good-bye to Angela after this week's challenge - so sad to see you and your gorgeous work leaving us, Angela. But I'm happy to introduce to you our newest team members: Donna Duquette (aka Donnarie on SCS) and Kerri Michaud (aka girlydecou). You will love their creations! They will both be joining in on our next challenge on Thursday.

In the Divine Diva tradition (OK, so it's not a long tradition, but it's a good one!) here is the Q&A with our new DT members.

Donna says:
(1) Where is your hometown? I grew up in Enfield, CT
(2) Where do you live now (if different)? I'm still in Connecticut, but I live in East Granby now.
(3) How long have you been stamping? I've been stamping seriously for about five years and off and on for several years before that.
(4) What is your favorite stamping/cardmaking style? Good question! I appreciate any well-executed design and enjoy experimenting with different styles. But, I find that I gravitate toward clean and simple designs, and I’ve always loved the shabby chic style for romantic cards.
(5) What do you find most challenging or difficult when you're making a card? The one thing I find myself agonizing over time and again is how to place a sentiment on a card. I never seem to have the right size or font to go with my card design.
(6) What is your all-time favorite color? Green is my favorite, especially yellow-green colors like olive, kiwi, lime and celery. I must have 20 different shades of green ink, and I am forever having to replenish my green cardstock supply.
(7) What is your favorite technique? I love to color, and at the moment, my Copic markers and colored pencils are the media I reach for most often.
(8) What is your favorite embellishment? What do all of your cards have to have? Ribbon... A card without ribbon just seems naked!
(9) What do you usually start with when designing a card? The colors, the image, or something else? When I’m working on Design Team assignments, I almost always start with an image. When I’m making cards just for me, my starting point could be just about anything. I might have a piece of paper I want to use, a technique I want to try, a theme, or I might just need a birthday card for someone special. Some of my favorite cards started off with no particular outcome in mind. They just sort of happened.

Kerri says:
(1) Where is your hometown? I grew up in Laramie, Wyoming
(2) Where do you live now (if different)? Since my hubby and I married 9 years ago, we’ve lived in Grand Junction, Colorado, Greenville, SC, Pittsburgh, PA, and now Apopka, Florida - just north of Orlando
(3) How long have you been stamping? Just over a year!
(4) What is your favorite stamping/cardmaking style? I love lots of layers and something always has to be “popped up”!
(5) What do you find most challenging or difficult when you're making a card? The layout. I LOVE a good sketch :)
(6) What is your all-time favorite color? I would have to say Chocolate Chip. I think it looks great with everything!
(7) What is your favorite technique? Coloring with Copics is fastly becoming my favorite!
(8) What is your favorite embellishment? What do all of your cards have to have? Dimension, texture, and usually ribbon!
(9) What do you usually start with when designing a card? The colors, the image, or something else? Usually the image, then the dp. I build my colors around that :)

Thanks for visiting and welcoming the new team members. I hope you'll come back and play our challenge on Thursday!

Sunday, September 13, 2009

Don't look now...

I actually played an SCS challenge. It's been a long time - about a month, I think! That might be a record. Well, I needed to make a birthday card so it seemed like the perfect chance to play the featured stamper challenge. And for today's challenge: the fabulous Shannan Teubner. You know her, you love her... she's amazing!

Out of all of Shannan's wonderful cards I picked this one for my CASE. I thought it would suit the style that my friend would like. I looked through my stamps and decided I would use the hostess set Asian Artistry. I went for softer colors, and I changed the layout quite a bit. I used brads but placed them differently, added some ribbon, and changed the sentiment treatment. I also made it a 5 1/4" square card - since I'm hand delivering this one, I don't need to worry about extra postage, and then I had plenty of room for my big circle.

First I stamped the image in chocolate chip on mellow moss cardstock, then added shading with white gel pen. Tip of the day: The white ink takes longer to dry than you might think! Watch out for smudges. I used Nestabilities for my circles, with really rust and chocolate chip cardstock. The background papers are from the retired Spanish set Juntos. I covered the join of the papers with chocolate chip taffeta ribbon, and I tried to add a bow but it didn't really fit on this card. LOL! The sentiment is from Teeny Tiny Wishes, and I used whisper white textured cardstock for it and the base. I used the large oval and offset the words all the way to the left, punched a scalloped oval from textured rust cardstock, then punched a small oval out of chocolate chip and made a tab, with a Making Memories copper brad to hold it together. Then for balance I added three more brads in the upper left. I don't know if you can see, but there are lots of dimensionals on this card: the center moss and rust circles were adhered over the chocolate chip scalloped circle with them, as was the sentiment, and then I even used them to adhere the square to the card base. I figured I'd go crazy with popping things up since this isn't going in the mail!

This might be the only card that I get to make till the next DDIC on Thursday... sometimes I need to pay the bills, LOL. This is one of those weeks when I actually have some freelance work. But I'll definitely be back on Thursday, if not before. I also want to say thank you so much to all my new followers and subscribers - I'm really pleased to have you here and I hope you enjoy what you see!

Saturday, September 12, 2009

Thankful for Fall

Welcome to the OCC challenge for this week: Happy Fall, Y'all! I am enjoying the cooler temperatures - even though it hardly feels like we had summer here - and I'm also having fun pulling out my fall colors and papers. It feels good!

Anyway, the challenge is to make a fall-themed card, and here is mine. I knew I wanted to cut out my images, but I had a hard time choosing which ones to use. In the end I went with Trendy Trees. I stamped the trees with crushed curry, really rust, and chocolate chip on very vanilla cardstock, then cut them out. My DP is by October Afternoon. I sponged chocolate chip ink on the edges of the DP and cardstock panels, then mounted the trees with dimensionals.

I had the hardest time figuring out where to put the sentiment - I actually had to put this card aside for a while, which is what seems to work best for me when I get stuck. When I came back to it, the idea of the Nesties oval behind the tree panel just hit me and I love the result. The sentiment from Sincere Salutations was stamped in rust, then I added a bow of Making Memories ribbon and a mustard button from the Playground set (it looks a lot like the curry, I think!) tied with linen thread. And that's it! I had a great time with this challenge, and I hope you'll come and play along!

Friday, September 11, 2009

A historic week

Sorry that I haven't been around! This week both kids started school - Ben in kindergarten and Sarah at the same preschool where Ben went for two years. So it's been busy. Here are just a few photos - I didn't get very many of Ben getting on the bus because it was a bit of a madhouse. We are lucky to have lots of kids in our neighborhood and several of them are in the same school (K-2).

Anyway... here is Ben waiting for the bus...

and on the bus - you can just barely see him sitting in the left front seat. He seems to have that as his regular seat and he likes being in the front!

Sarah's turn, outside the preschool...

and after school, playing on the playground - she was having a great time playing peekaboo!

They both enjoyed their first day - and for Ben, he's had two days now. He is in full-day K four days and I think it's going to be great for him. After he got home yesterday, he said that when he got to school he was a little nervous but then he realized that kindergarten was going to be fun. That's my boy! As for Sarah, she'd be happy to get on the bus and go to school with her big brother, but I think she's going to love preschool and do great. I'm really proud of my kids - and in disbelief at how fast the time is going!
Sunday, September 6, 2009

Putting on my demo hat...

This is a shout-out to anyone who lives in the area of Littleton MA and might be looking for a monthly Stampin' Up! stamp club, or even classes to attend. My club is in danger of not having enough people to run and I'm devastated about it! So if you or someone you know is in this area and looking for stamping events, please get in touch with me ASAP!

We always have a great time at club. We make two (occasionally three) cards and one 3-D project, usually learning a new technique (or two) somewhere along the way. I'm also totally open to requests for techniques, projects, or classes that my customers would like to have offered. I hope you'll contact me, or share this information with others! Thanks!

Saturday, September 5, 2009

This is an exciting day for me

I am so happy this day is here because I can finally share the news that I was selected to be part of the new design team for Our Creative Corner! When I got the email I was just beyond excited. I have played along with their fabulous challenges since the beginning and I was so honored to be chosen to be on this amazing team. I know there are lots of fun challenges coming up in the next few months so you'll want to be sure to check them out each Saturday.

This week's challenge was to use stars and stripes on our cards. It didn't have to be patriotic, though - and the first thing I thought of was a baby card. I mulled over a few ideas and finally chose the adorable bear from Cute & Cuddly. I colored him with Copics (E41, E42, E44, E47) on PTI vintage cream. I was aiming to match soft suede and based on some other artists' suggestions, I think I got pretty close!

The background is a creamy caramel panel with striped soft suede DP down the center. The sentiment from Nursery Necessities was punched with the word window and modern label punches. For embellishments I added punched stars with vintage brads (the same brads that I used on the sentiment) and some piercing in the opposite corners from the stars. Since this is a fairly simple card, I used lots of dimensionals to put it together and add a little bit more interest.

Thanks so much for visiting today. I am always so appreciative of all of you readers, followers and subscribers out there!

Friday, September 4, 2009

It's in the bag


The SCS inspiration challenge, that is! I'm happy to be guest hosting the challenge for this weekend. I decided that I would choose a site rather than a single photo for the IC this time. I think I settled on Moyna Bags because I had such a hard time choosing my favorites! I figured others would probably find plenty of inspiration here, too. I do ask, though, that you limit yourself to just the handbags. This site has tons of stuff and I don't want anyone (including me!) to be too overwhelmed! This photo is the bag I chose for my inspiration (click here to see the original).

I wanted to make the flowers and leaves on my main panel with very vanilla textured cardstock. The idea was a good one but it took a while to figure out how to accomplish that. The leaves came from the Summer Love rub-ons (which were in the spring mini catalog), and I cut them out and adhered the vanilla leaves to a kraft panel. Then I needed some flowers, and rather than using die-cuts (which was my first idea) I stamped this flower from Simple Friendship and cut them out with a bit of a border as I did with the rub-on leaves. To get a little sparkle in the center I used a Sakura clear glitter pen (hard to see in the photo, argh). I added the sentiment from Together Forever in basic gray - with the elegant flowers and color scheme I just felt like it should be a wedding card. The background uses more kraft cardstock and the Perfect Details texture plate. I added the gray ribbon (Offray) and basic gray layers, then adhered some vanilla pearls from the Pretties Kit for my final embellishments.

I'd love to see lots of gorgeous creations this weekend so I hope you'll play along! Thanks to Stephanie for asking me to step in. I always have a fabulous time and I hope you do, too!

Thursday, September 3, 2009

Divine Diva Inspiration Challenge #11


These fun sets of magnets from Greener Grass Design really caught my eye. I could see all kinds of inspiration from this collection!

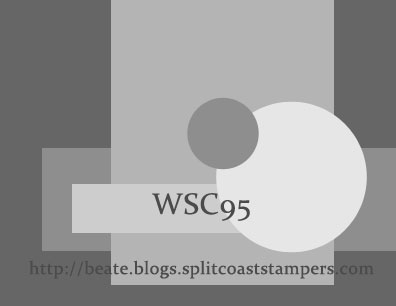
I haven't stamped in a while and I'm feeling rusty, so I went looking for a good sketch challenge to use. I liked the circles in Beate's most recent weekend sketch challenge so that's what I picked. As long as I was going with circles, I pulled out Circle Circus, which seemed to be the same sort of style as some of the magnets, and I pulled a color combo out of the whole set: rich razzleberry, not quite navy, and so saffron. A little adventurous, maybe... but I think they look great together!

I started by stamping and punching the two circle images. The sentiment from Upsy Daisy was stamped in the two other colors - can you see the rock 'n roll? I'd never done it on a sentiment before... kind of cool. I trimmed the end of the saffron cardstock like a ribbon notch. The patterned papers are from Razzleberry Lemonade and a retired Patterns Pack. To make the razzleberry panel, I used the Texture wheel and the small flower from Razzle Dazzle. I wanted to keep this pretty clean, so my only embellishments are saffron buttons from Button Latte, with white cardstock threaded through the centers.

Be sure to check out the cards made by all the Divine Divas for this challenge!

Angela

Anne

Chris

Julie

Keri

ETA: I'm sorry to announce that Chat has had to resign her position on the DT. She will be deeply missed!

Hope you are inspired to come and play along. Just leave a comment here with a link to your card. We can't wait to see what you create! The keyword for uploading on SCS will be DDIC11. Have fun and look for the next challenge on September 17!

Wednesday, August 26, 2009

Love Birds - a sketch challenge, sort of


Today I've been working on a card for a custom order in my Etsy shop. As I was planning my card, I was hunting around for a sketch challenge to do, and none of the ones I was finding fit what I needed to make. So I turned to my own master sketch file, which is made up of sketches I've saved from cards I've seen elsewhere. This is not my design, but unfortunately I have no idea whose layout it originally was. It was a card I saw in a magazine using PTI's Take a Bough set. I'd love to credit the original designer if I knew who she was!

I thought it might be fun to post the layout so that others could play along with this sketch. I could see so many possibilities from this one. If you do make a card using this sketch, link back here so I can see! I'm not too good at designing my own sketches so don't expect this to be a regular feature, LOL. It's just for fun for today, and maybe I'll decide to do another at some point - who knows?

OK, on to my card. I stamped the Love Birds (by Cornish Heritage Farms) with pacific point on PTI white cardstock, then paper pieced them with Making Memories Poolside Paperie paper. I used other prints from the collection for the other panels of the sketch, with Bazzill cardstock for layers. I made the sentiment on the computer with the words requested by the customer. I punched it out with the curly label punch, then used the Movers & Shapers die to cut the layers. The largest label was cut out from the window by trimming on the dashed line. I used the Finial Press embossing folder to make my dark blue layer, added a photo corner punch in the upper right, then adhered two silver brads in the opposite corners.

I just noticed that I messed up the sketch just a bit, in my placement of the embossed panel - but I think it's a good tweak. I hope you'll try out this fun sketch!

Sunday, August 23, 2009

Copic Love


I do love my Copics... but I don't love this card. I'm not sure why... but I spent a long time on it so I'm posting it anyway. Todd said, "It's fine!" But I don't always trust him, LOL.

This card started with the Copic Creations challenge to use red, pink, and hearts. Is it cheating that my hearts are punched and not colored? ;)

I decided to use these A Muse stamps that hadn't seen ink yet. I stamped with Memento tuxedo black on PTI white cardstock. My coloring on the birds uses all R markers: R37, R39, and R59 for red; R05 and R08 for orange; and R81, R83, and R85 for pink. The bushes were colored with YG93, YG96, and G99. I had read this post on contrast on Marianne Walker's blog and really tried to incorporate her advice - how did I do? I would love to take one of her classes if she ever came to this area. I colored the fence just a little bit - I drew a line with E41 down the left side of each area of the fence and then blended it out with the colorless blender. I don't know if it makes a difference at all, but I wanted to try. I also added a little C1 shadow around the fence and bushes.

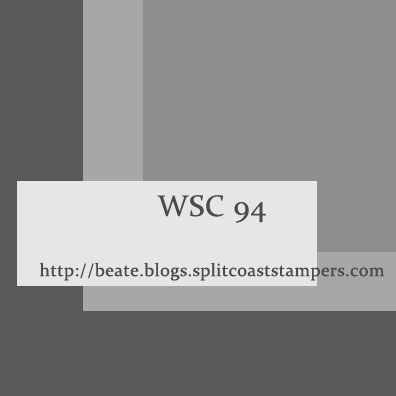
For the rest of the card, I used Beate's weekend sketch challenge #94. The black and white paper is by Doodlebug, and the cardstock is Bazzill. I embossed the red with the new SU Perfect Details texturz plate. The buttons are from JoAnn's, threaded with black embroidery floss. The ribbon probably came from Michaels. I punched my hearts with SU heart punches, then drew stitching lines to match the stamped images and added American Crafts letter stickers to the larger heart.

OK, I posted it and I'm moving on! Thanks for stopping by!

Thursday, August 20, 2009

Divine Diva Inspiration Challenge #10


Can it really have been ten challenges already? I hope you are having fun because I know we are! This week we're doing a bedding challenge, which is one of my favorite categories to choose from. I found this gorgeous set at Wrapables - the rich colors reminded me that fall is going to be here soon. We've had a heat wave here in MA so it's hard to believe that it really will be cool before we know it!

I don't know what the photo looks like on your screen, but it looks like purple to me, and it wasn't until I was typing this up that I realized the description says it's brown. When I picked it I was going for purple, so that's what you're getting from me! ;) The layout came from Day 3 of the Mojo Monday Turns 100 celebration. This is a great sketch that Teresa Kline provided - thanks, Teresa! I didn't follow it exactly, however - I had to leave out a couple elements.

To emulate the "purple" bedspread, I started my card by embossing an image from the new set Leaf Lines onto perfect plum cardstock with gold EP. Then I took the large image from Kind & Caring Thoughts and embossed it on brushed gold CS with American Crafts Zing! chestnut EP. (I was inspired by the small gold pillow.) I cut and layered with Nestabilities and chocolate chip cardstock. I used a gold card base and made this card a 5x7 so I could use more of my embossed background. The chocolate chip scalloped piece was cut from the pennant die - I wanted bigger scallops than I could get with any of my punches. I added a strip of gold organdy ribbon and a bow. The sentiment is by Inkadinkado, and I cut that out with another Nesties rectangle and centered the text near the top, then just attached it to the back of the gold layer. My faux brads are gold-embossed chipboard circles (from some Basic Grey chipboard).

Be sure to check out the cards made by all the Divine Divas for this challenge!

Angela

Anne

Chat

Chris

Julie

Keri

Hope you are inspired to come and play along. Just leave a comment here with a link to your card. We can't wait to see what you create! The keyword for uploading on SCS will be DDIC10. Have fun and look for the next challenge in two weeks!