I promised you one more new color card, and here it is. Using the SCS sketch challenge, I created this card featuring the last of the new colors: Concord Crush, one of the In Colors for the next two years. I used a color combination I found in the new catalog and paired it with Rich Razzleberry, Perfect Plum, and So Saffron. This can be found on p. 123. I also borrowed the bird idea from a card on p. 17 of the catalog - it's one of my favorite samples in the whole IBC. (One more day!! No, I'm not excited at all!!!!)
First I stamped the floral block from For You All Do with razzleberry ink onto razzleberry card stock, then punched the bird's body from that. I added a plain plum wing and saffron branches on a panel of Very Vanilla card stock. The background is made up of a saffron card base stamped with the largest and smallest flowers from the same stamp set, a panel of plum DP, and a razzleberry strip embossed with the square lattice folder. I used Concord Crush card stock for all the layers. The sentiment is from On a Pedestal. It might be hard to see, but the scalloped layer was cut from the Pennant die, then I trimmed it to size and added the three saffron Button Latte buttons (tied with linen thread) in the scallops.
OK, so you've now seen all of the new colors on my blog. I hope you've enjoyed them - I've had a blast playing with them and it'll be fun to keep incorporating them into my work in the coming weeks. I'll be back tomorrow with the DDIC of the week!
Wednesday, June 30, 2010
Sunday, June 27, 2010
New Color Creation #7
I'm back with another new color combo, featuring one of the two colors I haven't shown yet. This card uses the new In Color called Poppy Parade. When I first saw this color I wasn't sure I liked it, but I think it's growing on me after working with it. I did a couple other new things with this card: my first easel card, which was today's challenge at the relatively new challenge blog Always Playing with Paper.
I used Beate's tutorial on SCS to make my card, following the variation for A2 size. The main panel starts at 3 1/8", with a 3 1/4" poppy square, a 3 13/16" Daffodil Delight square punched with the scallop trim punches, then finished with Old Olive on the base poppy layer. I stamped two flowers from Punched Posies in daffodil, then punched out poppy centers.
Here's a shot of the bottom of the card. To hold up the easel I used more scallop punched strips over the white sentiment panel, then I added the daffodil butterfly. I let the scallops and piercing be my "embellishments" - no need for anything else here. The sentiment comes from the new hostess set Occasional Quotes - just a few more days until the new catalog goes live on July 1 and you can get all these great products for yourself!
OK, one more color left to show you, so watch for that later this week - I promise to do that one card, at the very least!
I used Beate's tutorial on SCS to make my card, following the variation for A2 size. The main panel starts at 3 1/8", with a 3 1/4" poppy square, a 3 13/16" Daffodil Delight square punched with the scallop trim punches, then finished with Old Olive on the base poppy layer. I stamped two flowers from Punched Posies in daffodil, then punched out poppy centers.
Here's a shot of the bottom of the card. To hold up the easel I used more scallop punched strips over the white sentiment panel, then I added the daffodil butterfly. I let the scallops and piercing be my "embellishments" - no need for anything else here. The sentiment comes from the new hostess set Occasional Quotes - just a few more days until the new catalog goes live on July 1 and you can get all these great products for yourself!
OK, one more color left to show you, so watch for that later this week - I promise to do that one card, at the very least!
Saturday, June 26, 2010
Summer watercolors
Happy Saturday! It's another challenge day for Our Creative Corner, and for her final challenge Linda Coughlin asked us to use cool blues and greens for summer. I combined these colors with the Joseph's Coat technique on a card we'll be making at my club this weekend.
First I stamped the En Francais background with Not Quite Navy on a panel of Whisper White card stock. Next I sponged Marina Mist and Certainly Celery ink over the panel. The image from Watercolor Trio was stamped three times with Versamark, embossed with clear EP, then covered with Marina Mist ink with a brayer. Once you wipe off the excess ink the soft sponged colors come out - it's a very cool technique. To finish the card I added a strip of retired celery DP, a strip of Not Quite Navy punched with the eyelet border punch, a sentiment from On Your Birthday, and a button faux tied with Marina Mist ribbon.
I hope you'll visit the OCC and play along with our challenge - I just love blue and green on my cards and I can't wait to see some wonderful colors this week!
First I stamped the En Francais background with Not Quite Navy on a panel of Whisper White card stock. Next I sponged Marina Mist and Certainly Celery ink over the panel. The image from Watercolor Trio was stamped three times with Versamark, embossed with clear EP, then covered with Marina Mist ink with a brayer. Once you wipe off the excess ink the soft sponged colors come out - it's a very cool technique. To finish the card I added a strip of retired celery DP, a strip of Not Quite Navy punched with the eyelet border punch, a sentiment from On Your Birthday, and a button faux tied with Marina Mist ribbon.
I hope you'll visit the OCC and play along with our challenge - I just love blue and green on my cards and I can't wait to see some wonderful colors this week!
Thursday, June 24, 2010
Sunshine Award
Chanda Stehlik was so gracious to honor me with the Sunshine Award on her blog. This award goes to bloggers whose positivity and creativity inspires others in the blogging world. Aw, shucks, thanks, Chanda! She has some lovely stuff on her blog so you should go check it out.
I know that I'm supposed to turn around and give this award to some other bloggers, but as I'm swamped getting ready for club tomorrow, I will just say thanks to everyone who inspires me - some are on my blog roll, and some are not, but there are so many wonderfully creative people out there that deserve this award and I just can't narrow it down right now! :)
Wednesday, June 23, 2010
New Color Creation #6
Are you having fun seeing all the new colors? I think I've used all but one and I'll try to get it in before July 1! This is a card that we'll make at my club meeting this week. I used two new colors, Blushing Bride and Cajun Craze, along with Very Vanilla, Old Olive and Soft Suede. I am loving all the fresh color combos that these new colors offer!
My card is a CASE of this card, which I just thought was fabulous. I kept more of the original than I usually do - it was so great that I had to! The "notebook" paper was made with my scoring tool and spiral punch, then I took the Soft Suede pad directly to the card stock before sponging on a bunch more. I used With All My Heart and Sweetheart with the extra large flower punch to make my image - I just love these stamps together. I kept the A to Z image on the blush panel - the Soft Suede was stamped off once to keep it from being too dark. The faux ricrac is done with the scallop edge punch - I started with a 1" strip of Cajun Craze card stock, punched one side, then offset the punch to do the other side. I used a tab of 1 1/4" striped ribbon and a sentiment from All Holidays to finish it off.
I'm still working on what the other two club projects will be, so I'd better get back to it. Thanks for stopping by - I always appreciate those of you who visit!
My card is a CASE of this card, which I just thought was fabulous. I kept more of the original than I usually do - it was so great that I had to! The "notebook" paper was made with my scoring tool and spiral punch, then I took the Soft Suede pad directly to the card stock before sponging on a bunch more. I used With All My Heart and Sweetheart with the extra large flower punch to make my image - I just love these stamps together. I kept the A to Z image on the blush panel - the Soft Suede was stamped off once to keep it from being too dark. The faux ricrac is done with the scallop edge punch - I started with a 1" strip of Cajun Craze card stock, punched one side, then offset the punch to do the other side. I used a tab of 1 1/4" striped ribbon and a sentiment from All Holidays to finish it off.
I'm still working on what the other two club projects will be, so I'd better get back to it. Thanks for stopping by - I always appreciate those of you who visit!
Labels:
clubs and classes,
New Color Creations,
Stampin' Up
Sunday, June 20, 2010
New Color Creation #5
This card will be going to my wonderful husband tonight. It features the new colors of Cherry Cobbler and Early Espresso, along with Night of Navy. It's also for the Sweet Sunday sketch challenge.
I first stamped the Medallion with cherry ink onto naturals ivory card stock, then I inked the stamp again with the navy ink and stamped it a second time so I could punch out the center. I had the idea to stamp another cherry medallion on the cherry card stock to layer the image - what do you think of this effect? I used dimensionals to position the three separate parts in the right spot. In the corner I added three silver brads, then I used my Memory Box sentiment and the modern label punch and Movers & Shapers. The last touch was a strip of navy DP (from the current hostess pack) on an espresso card base.
I'm off to play with the kids in the sprinkler - Todd is taking a much-deserved nap and we will give him his gifts tonight. Happy Father's Day to all the dads - including my own! Love you, Dad!
I first stamped the Medallion with cherry ink onto naturals ivory card stock, then I inked the stamp again with the navy ink and stamped it a second time so I could punch out the center. I had the idea to stamp another cherry medallion on the cherry card stock to layer the image - what do you think of this effect? I used dimensionals to position the three separate parts in the right spot. In the corner I added three silver brads, then I used my Memory Box sentiment and the modern label punch and Movers & Shapers. The last touch was a strip of navy DP (from the current hostess pack) on an espresso card base.
I'm off to play with the kids in the sprinkler - Todd is taking a much-deserved nap and we will give him his gifts tonight. Happy Father's Day to all the dads - including my own! Love you, Dad!
Labels:
New Color Creations,
sketch challenge,
Stampin' Up
Saturday, June 19, 2010
New Color Creation #4
I'm back with some more new colors - something bright and cheery this time! This is also my card for this week's challenge at Our Creative Corner. Our hostess Linda Coughlin asked us to CASE one of the other OCC team members. What a tough decision - so much wonderfulness to choose from! I ended up picking this card from Sarah Gough. It had the happy, summery look I was going for and I just love Sarah's style, whether clean and simple or full of vintage detail.
Looking at Sarah's card I immediately thought of the new hostess set called Apple Blossoms. The colors I chose are Daffodil Delight, Pear Pizazz, and Peach Parfait (another of the new In Colors - this was my first time trying it out). The flowers were inked with a faux rock and roll technique - I used the peach marker on the edge after inking them in daffodil. I flipped the layout to fit my flowers and simplified things a bit. Instead of stitching - I don't sew on my cards, or on anything, LOL - I used a little bit of piercing. I embossed the pear card stock panel with the finial press folder and added three strips of daffodil ribbon around it. The finishing touch was the sentiment, which I topped with a daffodil bow.
Be sure you visit the OCC blog to see all the creations from the team - I can't wait to find out who CASEd whom!
Looking at Sarah's card I immediately thought of the new hostess set called Apple Blossoms. The colors I chose are Daffodil Delight, Pear Pizazz, and Peach Parfait (another of the new In Colors - this was my first time trying it out). The flowers were inked with a faux rock and roll technique - I used the peach marker on the edge after inking them in daffodil. I flipped the layout to fit my flowers and simplified things a bit. Instead of stitching - I don't sew on my cards, or on anything, LOL - I used a little bit of piercing. I embossed the pear card stock panel with the finial press folder and added three strips of daffodil ribbon around it. The finishing touch was the sentiment, which I topped with a daffodil bow.
Be sure you visit the OCC blog to see all the creations from the team - I can't wait to find out who CASEd whom!
Thursday, June 17, 2010
Divine Diva Inspiration Challenge #30
Welcome to this week's challenge! For this time around I just fell in love with this retro-style photo from Nostalgia Organics. Isn't it just too sweet?
I'm taking a little break from my New Color Creations - sort of. I used three returning colors (former In Colors) on this card: Baja Breeze, Pink Pirouette, and Wild Wasabi, along with Real Red and Whisper White. I let the photo inspire my layout with the scalloped corners (done with an EK Success punch) and the Real Red ribbon band across the center. The strawberry is from Tart and Tangy, and behind it I used the new Homemade stamp that fits perfectly with the fabulous 2 3/8" scalloped circle punch. I love this punch - it's so, so great. The 1 1/4" and 1 3/8" circles cover up the stamp's words so I was left with just the sweet border for the scallops. The sentiment is a rub-on by American Crafts, which I applied to a Wild Wasabi tag, then for a little more vintage fun I added three buttons. I used linen thread for the tag bow and to thread the buttons. The background uses retired Pink Pirouette DP that came as close as I could find to looking like fabric.
Be sure to check out the cards made by all the Divine Divas for this challenge!
Anne
Chris
Donna
Julie
Kerri
Hope you are inspired to come and play along. Just leave a comment here with a link to your card. We can't wait to see what you create! The keyword for uploading on online forums will be DDIC30. Have fun and look for the next challenge on July 1!
I'm taking a little break from my New Color Creations - sort of. I used three returning colors (former In Colors) on this card: Baja Breeze, Pink Pirouette, and Wild Wasabi, along with Real Red and Whisper White. I let the photo inspire my layout with the scalloped corners (done with an EK Success punch) and the Real Red ribbon band across the center. The strawberry is from Tart and Tangy, and behind it I used the new Homemade stamp that fits perfectly with the fabulous 2 3/8" scalloped circle punch. I love this punch - it's so, so great. The 1 1/4" and 1 3/8" circles cover up the stamp's words so I was left with just the sweet border for the scallops. The sentiment is a rub-on by American Crafts, which I applied to a Wild Wasabi tag, then for a little more vintage fun I added three buttons. I used linen thread for the tag bow and to thread the buttons. The background uses retired Pink Pirouette DP that came as close as I could find to looking like fabric.
Be sure to check out the cards made by all the Divine Divas for this challenge!
Anne
Chris
Donna
Julie
Kerri
Hope you are inspired to come and play along. Just leave a comment here with a link to your card. We can't wait to see what you create! The keyword for uploading on online forums will be DDIC30. Have fun and look for the next challenge on July 1!
Labels:
Divine Divas,
inspiration challenge,
Stampin' Up
Monday, June 14, 2010
New Color Creation #3
Here's a simple Father's Day card I made this morning to send to my father-in-law. My new colors I'm featuring today are Pear Pizazz and Cajun Craze. Pear Pizazz is one of the upcoming In Colors - and these five fun colors will be with us for two years! It's a pretty green, darker than Certainly Celery but lighter than Old Olive. Cajun Craze is a lovely rusty dark orange.
I took one of the stamps from Leaf Lines and stamped it three times with Chocolate Chip on naturals white card stock, then I colored it with Pear Pizazz and Cajun Craze markers. I added the sentiment (from Memory Box) in Cajun Craze and pierced a line under it for emphasis. In two corners I added retired Hodgepodge Hardware copper brads. Finally I finished off with a panel of Pear Pizazz embossed with the square lattice folder.
I hope you're enjoying seeing previews of the new colors as much as I'm loving playing with them. July 1 is just around the corner, right?
I took one of the stamps from Leaf Lines and stamped it three times with Chocolate Chip on naturals white card stock, then I colored it with Pear Pizazz and Cajun Craze markers. I added the sentiment (from Memory Box) in Cajun Craze and pierced a line under it for emphasis. In two corners I added retired Hodgepodge Hardware copper brads. Finally I finished off with a panel of Pear Pizazz embossed with the square lattice folder.
I hope you're enjoying seeing previews of the new colors as much as I'm loving playing with them. July 1 is just around the corner, right?
Labels:
clean and simple,
masculine,
New Color Creations,
Stampin' Up
Sunday, June 13, 2010
New Color Creation #2
Let's see if I can manage to start a little blog series - I will try to keep up with it, LOL! Since we have so many new colors, the possible combinations are just swirling around in my head. So I'm going to make a point of featuring at least two new colors on my cards between now and July 1. I'm calling this one New Color Creation #2 because my ice cream card was really my first card in the series. Sounds like fun, right?
This is also another card for the featured stamper challenge for today. LeAnne had so many great cards that I couldn't choose just one! This card jumped out at me for the way she put the scalloped circles under the ribbon, and I just had to try something similar.
I picked the Tropical Party stamp set for my flowers. The large flower is done in Cherry Cobbler and the small flower in Marina Mist. These two colors are *swooooon* gorgeous! I used one of the old olive prints from the matching Island Oasis papers, then for my darkest color I chose Early Espresso. I added faux stitching to my strip of Marina Mist card stock since I don't have any wide ribbon in these colors (yet?). The sentiment comes from Perfect Punches, and I stamped it in Early Espresso then colored in "friend" with my Cherry Cobbler marker. It's layered on Early Espresso thanks to my Movers & Shapers dies. I added a Playground olive button threaded with Marina Mist ribbon. The bow is not actually tied through the button - I just used glue dots - but it looks like it is, doesn't it? Pretty cool trick that may have convinced me I *need* this ribbon in every color!
This is also another card for the featured stamper challenge for today. LeAnne had so many great cards that I couldn't choose just one! This card jumped out at me for the way she put the scalloped circles under the ribbon, and I just had to try something similar.
I picked the Tropical Party stamp set for my flowers. The large flower is done in Cherry Cobbler and the small flower in Marina Mist. These two colors are *swooooon* gorgeous! I used one of the old olive prints from the matching Island Oasis papers, then for my darkest color I chose Early Espresso. I added faux stitching to my strip of Marina Mist card stock since I don't have any wide ribbon in these colors (yet?). The sentiment comes from Perfect Punches, and I stamped it in Early Espresso then colored in "friend" with my Cherry Cobbler marker. It's layered on Early Espresso thanks to my Movers & Shapers dies. I added a Playground olive button threaded with Marina Mist ribbon. The bow is not actually tied through the button - I just used glue dots - but it looks like it is, doesn't it? Pretty cool trick that may have convinced me I *need* this ribbon in every color!
I dunno 'bout this one...
I made this quick card for the featured stamper challenge, which is honoring LeAnne Pugliese today. This is the card I chose - I loved the CAS style and the text going up the side. And I did intend to use text but somehow it didn't work out that way, LOL!
I broke out a stamp set that will be available in the new catalog - it's called Artistic Etchings. The vintage look has a strong presence in the new catalog, and I love that style. I did stick with CAS mostly, though. I inked the medallion with crumb cake, stamped off once, then stamped the three images on the left side of the whisper white panel. The "amour" sentiment and the Eiffel Tower were stamped in basic black. I loved the white space on LeAnne's card, but on mine it just looked like too much white. Did I go too far with the big flower? It's from the pretties kit - I streaked a little crumb cake marker on the petals to make it stand out more. In the center I put a black button from my stash and one of the big pretties kit pearls, then I added kraft taffeta ribbon. Tell me what you think - I honestly don't know if I like this or not!
Saturday, June 12, 2010
Happy 4th
I have a triple-challenge card for you today, and it's my first-ever Fourth of July card. This week at Our Creative Corner, Linda wants us to do something to the corners of our cards. The layout comes from Taylor's latest sketch challenge. Finally, I'm entering this in Shelli Gardner's challenge to make something that sparkles. This just might be the sparkliest card I've ever made, LOL!
Knowing I was going for razzle-dazzle, I picked the July Fourth stamp set from the summer mini. All the images on my card come from that set. I stamped the fireworks onto pacific point cardstock, then I used heat and stick powder with dazzling diamonds glitter to make them sparkle. I did the same with the red punched star and the little stamped stars in the corner, using red galaxy glitter. I colored the sentiment with markers and then added more glitter with a glue pen. The large scallop border was made using 1" punched circles, then I added the real red panel stamped with firecrackers and embellished with rhinestone brads.
This was a fun card, and for even more fun, be sure to visit the OCC blog to see what the other super-talented DT members came up with. We can't wait to see what you do with your corners!
Labels:
Our Creative Corner,
sketch challenge,
Stampin' Up
Saturday, June 5, 2010
Chocolate Sprinkles
This week's challenge at Our Creative Corner is to make a card inspired by whatever summer means to you. I thought of a few different things but one memory that has always stood out from my childhood summers is riding our bikes to a local ice cream place that sold HUGE cones of the yummiest handmade ice cream for 25 cents. I loved going there as a kid and to this day ice cream is one of my favorite things in the world.
I combined this with the SCS inspiration challenge (the colors and the dots in this bedding set). I used the fun stamp set called Sweet Scoops for my card. Along with that, I couldn't wait to break out some of the goodies I got with my new catalog preorder! The colors on this card are early espresso, crumb cake (formerly kraft), blushing bride (one of the new In Colors) and whisper white. The layout comes from the Sweet Sunday sketch challenge. I stamped the scoops with the reverse kissing technique and put them onto cutouts from the scallop oval die. Of course I had to have chocolate ice cream for this card. The crumb cake scoop needed some chocolate sprinkles - perhaps it's coffee ice cream? Yum... OK, moving on...
The background is a panel of whisper white embossed with Perfect Polka Dots, with a panel of crumb cake cardstock stamped with - what else? - more chocolate sprinkles. You can never have too many, right? Since I can't get ribbon in blushing bride yet, I made my own with a narrow strip of cardstock and some faux stitching. Finally I added the sentiment, from the new set Perfect Punches. The only thing that isn't SU is the button, which I found in my stash - and it's a perfect match so I'm sure I'll be using these again. I threaded it with the new 1/8" taffeta ribbon in early espresso - if you cut it to a very sharp point this ribbon threads through the button holes quite nicely. I think this will be a fun addition to our ribbon selection!
OK, now I really want some ice cream... I know you will enjoy seeing what all the OCC team members have come up with for summery cards this week. I hope you'll play along with us!
Thursday, June 3, 2010
Divine Diva Inspiration Challenge #29
We haven't done a room challenge in a while, so here's a gorgeous one for you. This bedroom comes from Better Homes and Gardens. The colors are so calming - I wish I had this bedroom but Todd would never put up with purple, LOL!
I went with clean and simple since this bedroom has such clean lines. For colors I chose baja breeze, perfect plum, and chocolate chip. I didn't have any tulips so I chose this flower from Petal Pizazz instead, with a baja breeze corduroy button in the center and a couple branches punched from chocolate chip cardstock with the extra large bird punch. I used the same punch to make my background, inspired by the brown pillow with white leaves you can see on the bed. The duvet immediately brought to mind the new square lattice embossing folder, which I used on the baja breeze card base. A little piercing and a sentiment from Teeny Tiny Wishes, punched with the curly label punch, and I was all done.
Be sure to check out the cards made by all the Divine Divas for this challenge!
Anne
Chris
Donna
Julie
Kerri
Hope you are inspired to come and play along. Just leave a comment here with a link to your card. We can't wait to see what you create! The keyword for uploading on online forums will be DDIC29. Have fun and look for the next challenge on June 17!
I went with clean and simple since this bedroom has such clean lines. For colors I chose baja breeze, perfect plum, and chocolate chip. I didn't have any tulips so I chose this flower from Petal Pizazz instead, with a baja breeze corduroy button in the center and a couple branches punched from chocolate chip cardstock with the extra large bird punch. I used the same punch to make my background, inspired by the brown pillow with white leaves you can see on the bed. The duvet immediately brought to mind the new square lattice embossing folder, which I used on the baja breeze card base. A little piercing and a sentiment from Teeny Tiny Wishes, punched with the curly label punch, and I was all done.
Be sure to check out the cards made by all the Divine Divas for this challenge!
Anne
Chris
Donna
Julie
Kerri
Hope you are inspired to come and play along. Just leave a comment here with a link to your card. We can't wait to see what you create! The keyword for uploading on online forums will be DDIC29. Have fun and look for the next challenge on June 17!
Labels:
Divine Divas,
inspiration challenge,
Stampin' Up
Tuesday, June 1, 2010
June Card Kit of the Month
Here is my card kit for the month of June. With this card kit you’ll receive complete instructions and all the consumable supplies needed to make 6 of each of these card designs – a total of 12 cards. The price of this kit is just $15, including envelopes.
If you purchase the monthly kit, you will also have the opportunity to purchase the coordinating stamp set at 15% off retail price (tax and shipping not included). This month the featured stamp set is Elements of Style.
Elements of Style wood-mount stamp set regularly $27.95, with purchase of kit $23.76
Elements of Style clear-mount stamp set regularly $19.95, with purchase of kit $16.96
The rest of the products used in making these cards are given in the list below. If you have all of these then you’re ready to go, but just let me know if you’d like to order any of these items. You can also use the kit to make your cards with the supplies you already own. The original designs utilize a large number of punches, but the layouts are flexible enough that you should be able to substitute a variety of punches and dies.
Please get your orders to me by June 15. You will receive your kit before the end of the month.
Lori Rider
loririder (at) verizon (dot) net
978-486-8102
divastamper.blogspot.com
Local customers click to add to your cart:
If you need to receive your kit by mail, click on the "Add to Cart" button below. The shipping calculator is supposed to work for anywhere in the world, which means I can now ship outside the U.S. Let me know if you encounter any problems.

Additional Product List
• Bashful Blue Classic Ink ($5.95) and reinker ($2.95 – optional but recommended)
• Chocolate Chip Classic Ink ($5.95)
• Rich Razzleberry Classic Ink ($5.95) and reinker ($2.95 – optional but recommended)
• Rich Razzleberry Stampin’ Write marker (from set of In Color markers, $17.95)
• Watercolor Trio stamp set ($22.95/16.95)
• Extra-large flower punch ($15.95) or five petal punch ($15.95)
• Boho Blossoms punch ($15.95)
• Large oval punch ($15.95)
• Scalloped oval punch ($15.95)
• 1 ¼” circle punch ($15.95)
• 1 3/8” circle punch ($15.95)
• Scallop circle punch ($15.95)
• Aqua Painter (medium; set of medium/large $16.95) or paint brush
• Stamping sponge (set of 3, $3.50) or paper towel
• Paper snips ($9.95)
• Bone folder ($6.95)
• Stampin’ Dimensionals ($3.95)
• SNAIL adhesive ($6.95)
• Mini glue dots ($3.95)
• Post-it Note
Please let me know if there are any questions about the kit and thanks for visiting!
If you purchase the monthly kit, you will also have the opportunity to purchase the coordinating stamp set at 15% off retail price (tax and shipping not included). This month the featured stamp set is Elements of Style.
Elements of Style wood-mount stamp set regularly $27.95, with purchase of kit $23.76
Elements of Style clear-mount stamp set regularly $19.95, with purchase of kit $16.96
The rest of the products used in making these cards are given in the list below. If you have all of these then you’re ready to go, but just let me know if you’d like to order any of these items. You can also use the kit to make your cards with the supplies you already own. The original designs utilize a large number of punches, but the layouts are flexible enough that you should be able to substitute a variety of punches and dies.
Please get your orders to me by June 15. You will receive your kit before the end of the month.
Lori Rider
loririder (at) verizon (dot) net
978-486-8102
divastamper.blogspot.com
Local customers click to add to your cart:
If you need to receive your kit by mail, click on the "Add to Cart" button below. The shipping calculator is supposed to work for anywhere in the world, which means I can now ship outside the U.S. Let me know if you encounter any problems.
Additional Product List
• Bashful Blue Classic Ink ($5.95) and reinker ($2.95 – optional but recommended)
• Chocolate Chip Classic Ink ($5.95)
• Rich Razzleberry Classic Ink ($5.95) and reinker ($2.95 – optional but recommended)
• Rich Razzleberry Stampin’ Write marker (from set of In Color markers, $17.95)
• Watercolor Trio stamp set ($22.95/16.95)
• Extra-large flower punch ($15.95) or five petal punch ($15.95)
• Boho Blossoms punch ($15.95)
• Large oval punch ($15.95)
• Scalloped oval punch ($15.95)
• 1 ¼” circle punch ($15.95)
• 1 3/8” circle punch ($15.95)
• Scallop circle punch ($15.95)
• Aqua Painter (medium; set of medium/large $16.95) or paint brush
• Stamping sponge (set of 3, $3.50) or paper towel
• Paper snips ($9.95)
• Bone folder ($6.95)
• Stampin’ Dimensionals ($3.95)
• SNAIL adhesive ($6.95)
• Mini glue dots ($3.95)
• Post-it Note
Please let me know if there are any questions about the kit and thanks for visiting!
Sunday, May 30, 2010
Birthday Bliss
I found time for a little stamping this morning - I wanted to do a couple challenges. The sketch is Jen del Muro's Sketch for You to Try, and the colors come from the ColourQ challenge. This is my kind of color challenge - six colors! I didn't realize until I was all done that I used brocade blue instead of ballet blue... oops! Don't shoot me, LOL!
For the big circle I picked the cupcake from Party Hearty. The frosting and candle are popped up on the (of course) chocolate cupcake. I used Nestabilities for the white and kraft circles. The DPs are a mix of current and retired pattern prints, along with a strip from Island Oasis. The sentiment from Birthday Bliss has the center popped up, with a layer from the Lots of Tags dies. Finally I added my clip with a knot of ribbon and a button attached with glue dots. What do you think? It didn't come out quite as masculine as I was envisioning, but I'm OK with that!
Saturday, May 29, 2010
Black and White Wedding

It's the last week of May challenges over at Our Creative Corner - and it's a great end to the month. Our hostess, Loretta Lock, is challenging us to create a black and white card with lots of texture, and there's a bonus element: use text as the focal point. I'm not sure what I think of this card - I think it was a good idea but maybe it didn't turn out quite like I envisioned... oh well!
The sketch comes from Jen del Muro. It was the perfect sketch since I had decided to take this stamp from Everything Nice and split up the two sections of text, then repeat "forever and always" three times. To get some texture I embossed with both black and white EP. The designer paper on the left comes from the retired pack Day and Night, and on the right I used the square lattice embossing folder. I embellished the card with Scribble Swirls cut from textured whisper white cardstock, flowers punched with the Itty Bitty flower punch and topped with Pretties Kit pearls, and black grosgrain and white satin ribbons.
Be sure to stop by the other OCC team members' blogs and see what they came up with - their creations are always amazing! Then be sure to play along since we love to see what you make each week. Have a great weekend!
Tuesday, May 25, 2010
I couldn't help myself
I got out my Copics for this card. It's been a long time, and I nearly forgot how fun they are to play with. I made this card for the first challenge in the SCS clean and simple design team tryouts. I don't know if I'll make it to the next round, but I had to try! This challenge called for using a person or character, and I discovered I'm sorely lacking in stamps in that department. So I went hunting for a digi image and found this one at Squigglefly. The colors came from the Making Memories embellishments I picked - another component of the challenge was to use a bold ribbon. I hope this is bold enough - it was tough for me!
The layout was inspired by the Mojo Monday challenge, but I didn't stick with the sketch in the end - the image was just too big! The colors worked well with bermuda bay and cameo coral, so I chose background papers in those colors. The coral comes from the Pink Flamingo papers, and the bermuda bay solid DP was embossed with a texture plate and sanded. I finished off with a Well Scripted sentiment. I have to say, I think it turned out pretty cute. And I may be tempted to get those Copics out again before too long...
Monday, May 24, 2010
Happiness is... summer!
I decided I wanted to play along with today's clean and simple challenge at SCS. The theme of the day is summer, so I brought out some bright colors and glittery flowers for my card. The flowers and "leaves" are two of the images in the hostess set Punched Posies. I made them sparkly with the help of heat and stick powder and Fine Supernova glitter. The striped paper is from the summer mini's Island Oasis collection. This print actually has a red stripe in it, which I didn't want, so I trimmed down the strips and put them onto old olive cardstock. Nice optical illusion, eh? I added a circle die-cut from the turquoise dot paper from the same pack, then a layer of olive cut with the Circle Scissors Plus. For the background I used so saffron DP, then I finished off with a Warm Words sentiment and just a bit of piercing, and two pumpkin pie Sherbet buttons tied with linen thread. Now I feel ready for summer, which I guess it's going to feel like around here tomorrow... bring it on!
Saturday, May 22, 2010
Gathering of Stampers
Tomorrow I'm cohosting a shoebox swap with my upline, Nola. My two main tasks for this were to prepare two card projects and make the party favors. I'll start with the cards... they are supposed to be springy and simple so I hope I satisfied both requirements!


My next card was inspired by a photo I saw browsing online stores - I didn't seem to save the link! It was a set of cards with layered butterflies in bright colors. I thought it would be pretty easy to make something similar with the Big Shot dies. I used bermuda bay, regal rose, so saffron and rich razzleberry. The sentiment is from Trendy Trees.
Attached to each box is a luggage tag using more of the Sweet Pea papers and the bird punch. I thought these turned out pretty darn cute, if I do say so myself... good thing I get to keep one for myself! And if you are dying to know what's inside the treat bags, it's white chocolate party mix. This stuff is really good, and really addictive... don't say I didn't warn you!

My first card was a combination CASE from the mini catalog (bright colors with the hostess stamp set Punched Posies) and Andrea Walford. I used real red, pumpkin pie and tempting turquoise for my stamped and punched flowers, and old olive textured cardstock for the leaves (done with the extra large bird punch). Each flower got a black vintage brad in the center. The background is retired turquoise DP stamped with a sentiment from On Your Birthday, plus more cardstock layers. I finished off with a strip of black satin ribbon. It's official - I now have this ribbon in every color. Love it!

My next card was inspired by a photo I saw browsing online stores - I didn't seem to save the link! It was a set of cards with layered butterflies in bright colors. I thought it would be pretty easy to make something similar with the Big Shot dies. I used bermuda bay, regal rose, so saffron and rich razzleberry. The sentiment is from Trendy Trees.
I decided to make a box for the party favor. It's pretty much a CASE of this one by Angie Juda, with a die-cut and embossed butterfly on the front. Inside I used a box rather than a bag, based on the box that's inside the purse shown here.
Attached to each box is a luggage tag using more of the Sweet Pea papers and the bird punch. I thought these turned out pretty darn cute, if I do say so myself... good thing I get to keep one for myself! And if you are dying to know what's inside the treat bags, it's white chocolate party mix. This stuff is really good, and really addictive... don't say I didn't warn you!Watercolor Birthday
Welcome to another Saturday and another challenge with Our Creative Corner. This week our hostess, Loretta Lock, gave us a fun sketch challenge. I kept it pretty simple this time around. I'm featuring the stamp set Watercolor Trio from the summer mini catalog. The main image was colored with melon mambo, not quite navy and certainly celery markers, then stamped on whisper white and cut out with Nestabilities. Behind that I put a certainly celery panel that was stamped generation style with another image from the stamp set. The bottom paper panel comes from Razzleberry Lemonade, with a sentiment from Sincere Salutations. To embellish I added a couple not quite navy buttons that I'd tied with embroidery floss and a simple white taffeta ribbon, and the final touch was to pierce the scallops on the not quite navy oval.I hope you'll go check out the sketch and the rest of the design team samples at the OCC blog - we always look forward to seeing what you create!
Friday, May 21, 2010
It's no Monet, but...
I think I like it! I needed a technique card for club tonight and came across the technique called impressionistic stamping on Julie Davison's blog. The basic idea is you stamp on wet paper, let it dry, then stamp again over the first image. It took me some practice to get a look I was happy with, but it's a cool technique.
I already had the stamp set Watercolor Trio (from the summer mini) out, and since Julie had used it on her cards and I liked how it turned out, I decided to follow suit. Otherwise this is my own creation - I had been trying to use a sketch I'd seen posted but it just didn't work out so I went off on my own. I actually do that sometimes, LOL!
For the flower panel I experimented with a few different things. This is what I felt worked best: First I inked up the stamp with melon mambo and old olive markers. Then I spritzed watercolor paper with water just a couple of times and spread the water around with a dry brush. (You could also use an Aqua Painter.) I stamped immediately on the wet paper and let it dry, then stamped the image over top. Despite this being a clear-mount stamp, I still used the Stamp-a-Ma-Jig because to me it looked best when the image was placed exactly where I wanted it. How much water you spray on the paper is a personal choice - I tried between one and four squirts. The more water you use, the more your image will spread. I liked this version because you could still see some of the detail of the image from the first impression - with more water the image was really blurred and I preferred it this way.
For the rest of the card, I used a couple different products: the Very Vintage wheel (soft suede ink on an old olive card base) and the vanilla Smooch Spritz. I stamped a panel of soft suede cardstock with the En Francais background (stamped off once first) then sprayed the Smooch on until it was covered. I finished the layout with a panel of melon mambo designer paper, a strip of 5/8" old olive grosgrain ribbon covered with soft suede, and a sentiment from the same stamp set, using the Matchbox and Lots of Tags dies.
I'm off to keep working on projects for my busy stamping weekend. I will be back tomorrow with my OCC card and I also hope to show you some other stuff I've been working on, if I have time to post - stay tuned!
I already had the stamp set Watercolor Trio (from the summer mini) out, and since Julie had used it on her cards and I liked how it turned out, I decided to follow suit. Otherwise this is my own creation - I had been trying to use a sketch I'd seen posted but it just didn't work out so I went off on my own. I actually do that sometimes, LOL!
For the flower panel I experimented with a few different things. This is what I felt worked best: First I inked up the stamp with melon mambo and old olive markers. Then I spritzed watercolor paper with water just a couple of times and spread the water around with a dry brush. (You could also use an Aqua Painter.) I stamped immediately on the wet paper and let it dry, then stamped the image over top. Despite this being a clear-mount stamp, I still used the Stamp-a-Ma-Jig because to me it looked best when the image was placed exactly where I wanted it. How much water you spray on the paper is a personal choice - I tried between one and four squirts. The more water you use, the more your image will spread. I liked this version because you could still see some of the detail of the image from the first impression - with more water the image was really blurred and I preferred it this way.
For the rest of the card, I used a couple different products: the Very Vintage wheel (soft suede ink on an old olive card base) and the vanilla Smooch Spritz. I stamped a panel of soft suede cardstock with the En Francais background (stamped off once first) then sprayed the Smooch on until it was covered. I finished the layout with a panel of melon mambo designer paper, a strip of 5/8" old olive grosgrain ribbon covered with soft suede, and a sentiment from the same stamp set, using the Matchbox and Lots of Tags dies.
I'm off to keep working on projects for my busy stamping weekend. I will be back tomorrow with my OCC card and I also hope to show you some other stuff I've been working on, if I have time to post - stay tuned!
Labels:
clean and simple,
clubs and classes,
Stampin' Up,
tutorial
Thursday, May 20, 2010
Divine Diva Inspiration Challenge #28
For this week's challenge we have this fun photo I found at Macy's. Aren't these fun colors? I just realized that we've had butterflies in the challenge for two weeks in a row, but I guess they are popular right now so I hope no one minds!
Looking at the purple flowers on the makeup case, I was inspired to pull out my Live Your Dream stamp set. I will probably never part with these stamps - I just love this flower image so much. I colored it with markers and cut it out with Nestabilities. The stamp set even has a tiny butterfly, so after sponging the edges with razzleberry ink, I added my little butterfly cutout. The background is the (retired) So Swirly wheel on a white card base, with DP from Cottage Wall and the melon mambo pack. I added a sentiment from Short & Sweet, punched with the modern label punch/Movers & Shapers, and a razzleberry bow with a Playground olive button tied with linen thread.
Be sure to check out the cards made by all the Divine Divas for this challenge!
Anne
Chris
Donna
Julie
Kerri
Hope you are inspired to come and play along. Just leave a comment here with a link to your card. We can't wait to see what you create! The keyword for uploading on online forums will be DDIC28. Have fun and look for the next challenge on June 3!
Tuesday, May 18, 2010
It's that time again
Club time! With the last weekend of the month being a holiday weekend my club rolled around quickly this month. We're going to make this card for Father's Day card - it's a really simple card and you could even leave off the piercing to make it simpler yet. I got my original idea from this card - but I did the unthinkable and didn't make a note whose blog it came from! Sorry to whoever made this originally - please tell me if you know who should get the credit!
I like to teach my club members at least one new technique each month. This is one that's really fast and easy but it's such a wow. I used the plain sheet from the chocolate chip designer paper pack, ran it through the Big Shot with one of our texture plates, then sanded the design with a sanding block. It only works with this paper because it has a white core. From that panel I punched out a large star and placed a piece of so saffron textured cardstock behind it. The background panel is from the Sweet Pea paper (retired, I know... but my clubbies are OK with that) on a layer of so saffron, which I pierced all the way around. Then I stamped the sentiment from Teeny Tiny Wishes onto bashful blue, added a bit more piercing and a Latte button (threaded with a tiny strip of the same chocolate chip DP), and put it all together on a bashful blue card base.
I have a lot of cards to make this week, so if I get time to post them, you'll be seeing more of me in the next few days... it's a busy week so we'll see how it goes! Thanks for stopping by!
Saturday, May 15, 2010
Crazy for Circles
Well, I am back to my old blogging ways this week. I worked so hard last week that I really had a tough time getting anything done after that! But here's my card for this week's challenge at Our Creative Corner. Loretta has challenged us to make a masculine birthday card - always a good thing to practice since it can be tough! To maximize my mojo I used a couple other challenges with this card: the Color Throwdown and a sketch designed by Jen del Muro.
The day I made this card I got a shipment of brand-new stuff from Stampin' Up!, with a lot of it coming out of the new summer mini catalog. I decided I would see how many of my new goodies I would use on my card, and I managed to get several of them on there. With the lack of layering this is kind of an unusual card for me, but I like how it turned out. I hope it's masculine enough!
I started with a kraft card base that I stamped with a couple different images from the Circle Circus stamp set. You have probably heard that with the Color Renovation, kraft is going to become Crumb Cake, and we will have ink to match the cardstock - but we don't have it yet so I just used Versamark. The Baja Breeze layer was embossed with the new folder that's called Square Lattice. It makes the most gorgeous texture.
I covered the So Saffron panel with another image from Circle Circus, perfectly laid out with the help of the Stamp-a-Ma-Jig. Below that I used a panel of Old Olive that I stamped with a sentiment from On Your Birthday. I've wanted this set for a long time and I finally got it. I filled out the left side of the olive panel with a bit of paper piercing, and to carry the kraft up I added a strip of taffeta ribbon. To make my circle I used a few different tools. The kraft and olive circles come from the Circles #2 die. The Baja Breeze circle comes from the last die in the Alphabet Simple set - I'm not really sure what the purpose of this circle is, but I love it! Finally I added one of the gears you get from the new cog punch with a circle specialty brad in the center. I got these brads free with the May scrapbooking promotion - a great way to add some fun hardware to your collection!
You'll definitely want to go take a peek at the rest of the designs from the OCC team, and then break out your masculine supplies and stamp along with us! Have a wonderful weekend!
The day I made this card I got a shipment of brand-new stuff from Stampin' Up!, with a lot of it coming out of the new summer mini catalog. I decided I would see how many of my new goodies I would use on my card, and I managed to get several of them on there. With the lack of layering this is kind of an unusual card for me, but I like how it turned out. I hope it's masculine enough!
I started with a kraft card base that I stamped with a couple different images from the Circle Circus stamp set. You have probably heard that with the Color Renovation, kraft is going to become Crumb Cake, and we will have ink to match the cardstock - but we don't have it yet so I just used Versamark. The Baja Breeze layer was embossed with the new folder that's called Square Lattice. It makes the most gorgeous texture.
I covered the So Saffron panel with another image from Circle Circus, perfectly laid out with the help of the Stamp-a-Ma-Jig. Below that I used a panel of Old Olive that I stamped with a sentiment from On Your Birthday. I've wanted this set for a long time and I finally got it. I filled out the left side of the olive panel with a bit of paper piercing, and to carry the kraft up I added a strip of taffeta ribbon. To make my circle I used a few different tools. The kraft and olive circles come from the Circles #2 die. The Baja Breeze circle comes from the last die in the Alphabet Simple set - I'm not really sure what the purpose of this circle is, but I love it! Finally I added one of the gears you get from the new cog punch with a circle specialty brad in the center. I got these brads free with the May scrapbooking promotion - a great way to add some fun hardware to your collection!
You'll definitely want to go take a peek at the rest of the designs from the OCC team, and then break out your masculine supplies and stamp along with us! Have a wonderful weekend!
Sunday, May 9, 2010
A Window for Mom

Happy Mother's Day to all the moms out there! I've had this card made for a while - we did it at my last club - but I didn't want to show it until now because I wanted it to be a surprise for a special mother out there. I love you, Mom!
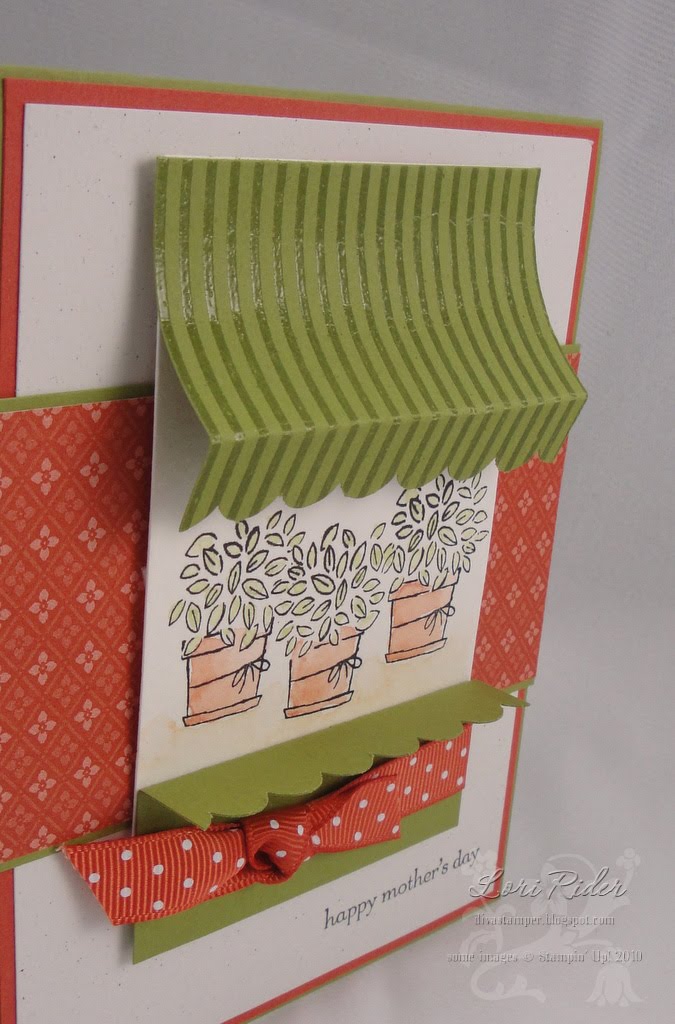
I had seen this adorable window card and decided to take the concept and adapt it for my card. I used the stamp set Bouquet Bunch, which is available in the new summer mini, and watercolored it with really rust, old olive, and creamy caramel watercolor crayons. The awning was embossed with the Solid Stripes a la carte stamp (which was in the Occasions mini) and I used the scallop edge punch for the edges of the awning and window sill.

Here's a close-up of the window. I rolled the awning gently around a large marker. The embossing did crack a teeny bit, but that just gives it an aged look, right? ;) After the watercoloring was finished I decided that dusty durango would look good with these colors, which gave me ribbon and designer paper to dress up the card. I added a sentiment from Teeny Tiny Wishes on a background panel of naturals white cardstock and that was it - sweet and not too complicated!
Saturday, May 8, 2010
Heavy Metal Dad
Here's another card from the card buffet - and also for the latest challenge at Our Creative Corner. This week we're supposed to take inspiration from the official anniversary gifts from one particular year. Since this year will be my 10th anniversary, I chose that one. Among its themes are aluminum and blue sapphire, so I pulled those two aspects out and made a Father's Day card. The layout comes from a sketch Jen del Muro designed for Skipping Stones.
First I ran a sheet of heavy-duty aluminum foil through the Big Shot with the diamond-pattern texture plate. A couple tips for this technique: Cut your panel to size first, because if you try to cut it after you emboss it, you'll mess up your embossing. You'll also want to use some kind of adhesive other than a tape runner so that you don't have to press down on the foil. I used dimensionals on my card. The more you handle it, the less pristine it will look, but that will just make it look a little more aged and worn in.
The rest of the card is pretty simple. I chose pacific point for my blue and paired it with black and white. The stamps come from Wonderful Favorites. I added silver eyelets at the bottom and embellished the tag by drawing a black line on the inside edge of the white tag and adding a bit of black 1/4" grosgrain ribbon. I didn't think it would be *too* girly to use just a bit of ribbon, especially since it's black.
I hope you enjoyed this card - you should try the embossed foil technique if you haven't before. It's a fun look! Be sure you check out the rest of the amazing work from the OCC team, and have a great weekend!
First I ran a sheet of heavy-duty aluminum foil through the Big Shot with the diamond-pattern texture plate. A couple tips for this technique: Cut your panel to size first, because if you try to cut it after you emboss it, you'll mess up your embossing. You'll also want to use some kind of adhesive other than a tape runner so that you don't have to press down on the foil. I used dimensionals on my card. The more you handle it, the less pristine it will look, but that will just make it look a little more aged and worn in.
The rest of the card is pretty simple. I chose pacific point for my blue and paired it with black and white. The stamps come from Wonderful Favorites. I added silver eyelets at the bottom and embellished the tag by drawing a black line on the inside edge of the white tag and adding a bit of black 1/4" grosgrain ribbon. I didn't think it would be *too* girly to use just a bit of ribbon, especially since it's black.
I hope you enjoyed this card - you should try the embossed foil technique if you haven't before. It's a fun look! Be sure you check out the rest of the amazing work from the OCC team, and have a great weekend!
Thursday, May 6, 2010
And now for something completely different
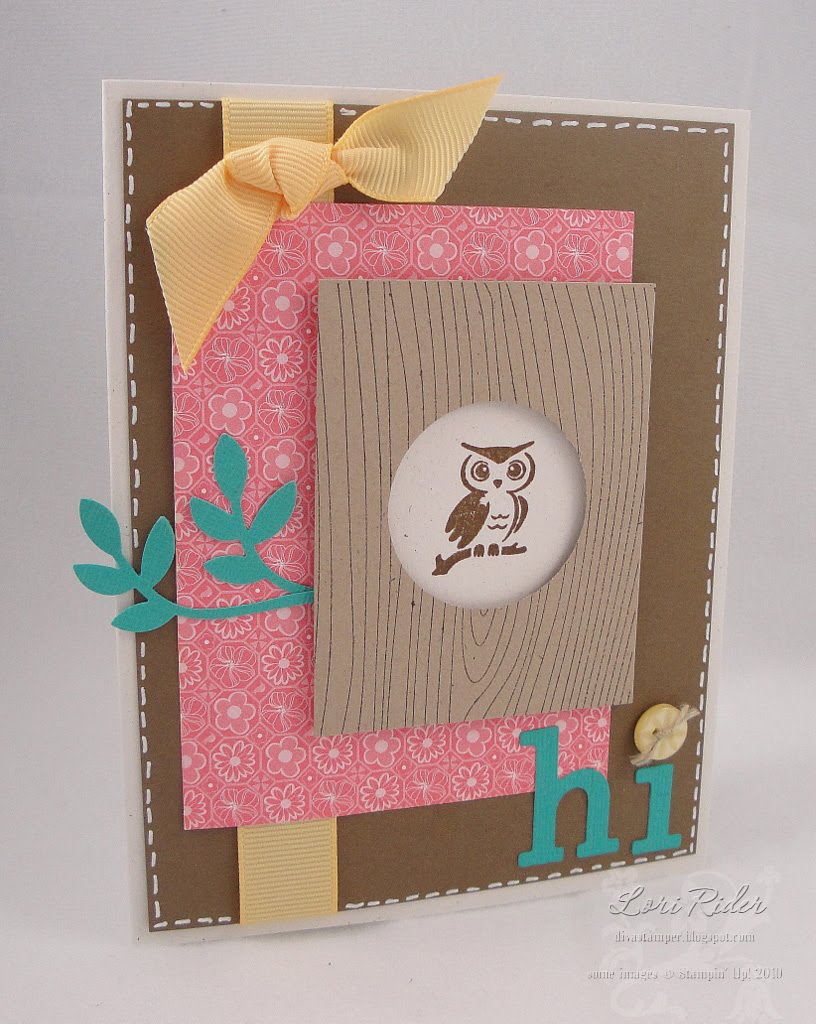
Are you tired yet? I am, LOL! I will be happy when it's actually time for the card buffet. This card was inspired by Angie Tieman. For my version I used the owl from Forest Friends, stamped with soft suede on naturals white cardstock. The frame is made with the woodgrain background stamp on kraft, then I punched a 1 3/8" circle for the owl to show through.
I decided to be kind of bright and adventurous with my colors - I think it works. I used textured bermuda bay cardstock for the die-cut letters (from Timeless Type) and the branches (punched with the extra large bird punch). Behind the wood panel I used a cameo coral printed paper from Pink Flamingo, then some so saffron grosgrain ribbon with a matching saffron button (from Button Latte) to dot the I. Finally, since I don't sew on my cards, I used the white gel pen to do faux stitching around the soft suede background panel.
That's it from me for today - I promise! I'm not 100% sure what the last two cards are going to be so you'll have to come back tomorrow and see if I post anything else. Thanks for sticking with me! I'm having fun, even though I'm tired, and I hope you're enjoying the cards.
I decided to be kind of bright and adventurous with my colors - I think it works. I used textured bermuda bay cardstock for the die-cut letters (from Timeless Type) and the branches (punched with the extra large bird punch). Behind the wood panel I used a cameo coral printed paper from Pink Flamingo, then some so saffron grosgrain ribbon with a matching saffron button (from Button Latte) to dot the I. Finally, since I don't sew on my cards, I used the white gel pen to do faux stitching around the soft suede background panel.
That's it from me for today - I promise! I'm not 100% sure what the last two cards are going to be so you'll have to come back tomorrow and see if I post anything else. Thanks for sticking with me! I'm having fun, even though I'm tired, and I hope you're enjoying the cards.
Another quick card for the buffet...

Here's a sweet little card I whipped up this afternoon. I started out intending to CASE the top right card on p. 142 of the Idea Book & Catalog, but I changed quite a bit on it.
I stamped the image from Crazy for Cupcakes in chocolate chip, then colored it with rich razzleberry and pink pirouette. I happened across this color combo completely by accident because these three colors of cardstock ended up next to each other in a stack, and I just thought it was so yummy! The pink panel was punched with the scallop trim border punch, then I added the sentiment from Birthday Bliss and finished off with razzleberry ribbon and a vanilla button from the Latte set tied with linen thread.
I have a feeling that the rest of the cards for tomorrow evening could end up being on the simple side - the clock is ticking. Last night at midnight I wrote down my ideas for the rest of my cards and that really helped me manage my time so far today. Three more to go, in a little over 24 hours... I think I can I think I can I think I can!
Sweet Little Baby Card
I'm just gonna say it up front - I totally love this card. I think it turned out so sweet! We'll be making this at the card buffet (I know you're shocked) and I did two challenges with this card: the OCC sketch and the Curtain Call Color Challenge. I thought maybe I could make a gender-neutral baby card with these colors, but I realized early on that it just wasn't working that way and I stopped worrying about it. I'll just cut a little bit of certainly celery paper and ribbon in case anyone wants to make a boy card.
I started by stamping the bear from Cute & Cuddly with not quite navy ink on kraft cardstock. Then I stamped the bear again on rose red DP and cut out the tummy. The whole bear was cut out and placed on the circle diecut that's in the Alphabet Simple set of dies. Around the edge I placed eight 3/4" punched circles. I used the same DP for the background panel, then added a rose red grosgrain ribbon and bow to the white panel with the sentiment colored with markers and a bit of piercing. To finish everything off I added some rounded corners.
OK, I'm up to six finished cards (I know you haven't seen all of them yet but others will be posted in the coming days). Things are coming along... I'm off to work on #7!
I started by stamping the bear from Cute & Cuddly with not quite navy ink on kraft cardstock. Then I stamped the bear again on rose red DP and cut out the tummy. The whole bear was cut out and placed on the circle diecut that's in the Alphabet Simple set of dies. Around the edge I placed eight 3/4" punched circles. I used the same DP for the background panel, then added a rose red grosgrain ribbon and bow to the white panel with the sentiment colored with markers and a bit of piercing. To finish everything off I added some rounded corners.
OK, I'm up to six finished cards (I know you haven't seen all of them yet but others will be posted in the coming days). Things are coming along... I'm off to work on #7!
Divine Diva Inspiration Challenge #27

Welcome to this week's challenge! I found this gorgeous photo at The Inglenook Decor - it had such beautiful colors and textures.

For my card I used the sketch challenge of the week that was posted on Stampin' Connection (for SU demos) - but I did play around with it a bit! I couldn't help myself. The sketch had three cut-out elements so my idea was to make a stenciled lattice with the Big Shot die (going gray sponged on whisper white cardstock) and put butterflies on top of it. I chose the butterfly from Great Friend, and with inspiration from the iridescent butterfly in the photo, I embossed it on basic gray cardstock using iridescent ice EP. The background is a panel of going gray textured cardstock stamped with the Sanded BG stamp in basic gray. Over that I added a panel of paper from A Walk in the Park, a strip of basic gray satin ribbon, and three rhinestone brads. Finally I used a sentiment from the same stamp set with oval punches.
Be sure to check out the cards made by all the Divine Divas for this challenge!
Anne
Chris
Donna
Julie
Kerri
Hope you are inspired to come and play along. Just leave a comment here with a link to your card. We can't wait to see what you create! The keyword for uploading on online forums will be DDIC27. Have fun and look for the next challenge on May 20!
Wednesday, May 5, 2010
Blissful Bride Bling
I'm back with another card for Friday's card buffet. I wanted to make a card with the wedding set from the summer mini, which is called Blissful Bride. I also used the SCS sketch challenge for today.
I stamped the wedding gown with basic gray on whisper white cardstock, then used the 2-way glue pen to add light blue Fine Cosmo glitter. The next white panel is from the Presto Patterns specialty paper, and if you look closely in the upper left of the panel you might be able to see that I sprayed it with vanilla Smooch Spritz. The back panel is bashful blue DP. For the sentiment I used the small oval punch on the stamp from Warm Words and then layered it onto one of the shapes from the Matchbox die. I kept the embellishments simple with two rhinestone brads and a bit of grosgrain ribbon.
This makes four cards done and six to go. I have one more card that I hope to make this morning, so I'm going to keep this short and sweet. Have a great day!
I stamped the wedding gown with basic gray on whisper white cardstock, then used the 2-way glue pen to add light blue Fine Cosmo glitter. The next white panel is from the Presto Patterns specialty paper, and if you look closely in the upper left of the panel you might be able to see that I sprayed it with vanilla Smooch Spritz. The back panel is bashful blue DP. For the sentiment I used the small oval punch on the stamp from Warm Words and then layered it onto one of the shapes from the Matchbox die. I kept the embellishments simple with two rhinestone brads and a bit of grosgrain ribbon.
This makes four cards done and six to go. I have one more card that I hope to make this morning, so I'm going to keep this short and sweet. Have a great day!
Labels:
clubs and classes,
sketch challenge,
Stampin' Up
Monday, May 3, 2010
May Card Kit of the Month
Sorry I'm a bit late posting this kit! It's been a little crazy around here. Here is the May kit. With this card kit you’ll receive complete instructions and all the consumable supplies needed to make 6 of each of these card designs – a total of 12 cards. The price of this kit is just $15, including envelopes.
If you purchase the monthly kit, you will also have the opportunity to purchase the coordinating stamp set at 15% off retail price (tax and shipping not included). This month the featured stamp set is Flight of the Butterfly.
Flight of the Butterfly stamp set regularly $31.95, with purchase of kit $27.16
The rest of the products used in making these cards are given in the list below. If you have all of these then you’re ready to go, but just let me know if you’d like to order any of these items. You can also use the kit to make your cards with the supplies you already own.
Please get your orders to me by May 15. You will receive your kit before the end of the month.
Lori Rider
loririder (at) verizon (dot) net
978-486-8102
divastamper.blogspot.com
Local customers click to add to cart:
If you need to receive your kit by mail, click on the "Add to Cart" button below. The shipping calculator is supposed to work for anywhere in the world, which means I can now ship outside the U.S. Let me know if you encounter any problems.
Additional Product List
• VersaMark ($7.50)
• Elegant Eggplant Classic Ink ($5.95)
• Tempting Turquoise Classic Ink ($5.95)
• Garden Green Classic Ink ($5.95)
• Clear Stampin’ Emboss powder ($4.75)
• Embossing Buddy ($5.95)
• Heat tool ($29.95)
• Brayer ($12.50) (or sponge/dauber)
• Paper piercing tool ($3.50)
• Butterfly punch ($15.95)
• Large oval punch ($15.95)
• 1 3/8” square punch ($15.95)
• Trio Flower punch ($15.95)
• Paper snips ($9.95)
• Bone folder ($6.95)
• Stampin’ Dimensionals ($3.95)
• SNAIL adhesive ($6.95)
Please let me know if you have any questions about this month's kit. Thanks so much for your support!
Subscribe to:
Posts (Atom)