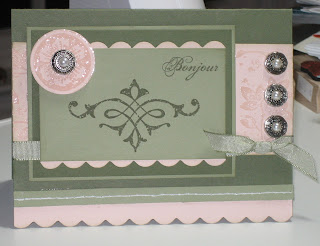
Friday, February 29, 2008

Quick and dirty


That's what I should call the card I made for today's limited supplies challenge on SCS! I didn't have much time at all but really wanted to get a card done because it was a really fun one.

The challenge was to use one flower stamp only (plus sentiment if desired) - no patterned paper, no background stamps. I have lots of flower stamps, so I picked this one from Garden Silhouettes and thought it would look nice with generation stamping. I feel sure I've seen someone else (or maybe many someones) do this with this stamp, but of course I couldn't find it when I was in a rush this morning. So if I accidentally CASEd you, let me know!

Once I picked the stamp I thought about colors... I always jump to green and blue but thought something else might be good. Then my eye happened to land on the Theatre ribbon originals that I bought back when I placed my first demo order - I've never used it till today. The chocolate chip satin ribbon is just so yummy and I thought that would be perfect. I paired it with bashful blue, which is I guess a trendy combo but I always love it.

First I took very vanilla and the blue ink and generation stamped the flowers several times. Then I inked the stamp in chocolate chip and made one focal flower image. Next I did more generation stamping, this time in chocolate chip, on bashful blue cardstock for the background. I stamped off once on a scrap before stamping on the blue so that it would be lighter. Once I cut it to size I really dirtied the edges up with chocolate chip ink and a paper towel, and then mounted it on a chocolate chip panel.

For the sentiment I chose the "warm wishes" from Hugs & Wishes. Oh, how it bugs me that it didn't stamp straight. I would have started over if I'd had the time. But I was in such a rush that I just had to let it go! Perfectionism is a nasty curse.

The size of the image meant this would be a portrait (vertical) card. I tore out the oval shape and again dirtied up the edges.

The next trick was to figure out where to put the gorgeous ribbon. I tried several different things but this worked the best. I also broke out my new Pebbles ribbon iron. What a nifty little tool - it's like a hair straightener for ribbon. Just be sure you preheat it enough and get the ribbon really centered inside the iron, and it'll probably take a few swipes to get all the creases out.

To finish the card off I mounted the torn panel onto the background with foam tape, and did the same when I mounted it onto the vanilla card. This was such a fun challenge and something that I'm sure I'll be trying again with some other flower stamps.

Thursday, February 28, 2008

Hannah update

I just talked to Brian, my brother. Hannah's surgery is all done and it seems to have gone just fine. They weren't able to get started until late afternoon, for some reason, but Brian said they're hoping to be able to see Hannah soon. The docs think because she's so young for this procedure, she may need a bit longer than average recovery time, which is normally about a week. She'll be in ICU until she's ready to be extubated, just like last time. There's also the likelihood that the third surgery, which normally happens around age 2, will be moved up. They've never done it on anyone younger than age 1, and that was apparently an extreme case. Brian hopes they're looking at spring 2009 at the earliest but no one can really say. At any rate, thanks for all the prayers and good wishes.

Project Organization, phase 1


No time for stamping today, but I did manage to get my fantabulous Elfa unit put together and filled up over the past few days. Todd helped me assemble it. Just a tip if you buy this and put it together yourself - forget the rubber hammer they say to use. It did hardly anything. We just had to bang away on the metal with a regular hammer and although it did get a bit dinged up in places, since the joints are pretty much covered, I didn't care.

I really love how this works for stamping supplies. By stacking the units 2x2 it comes to counter height, so I'll be putting my paper trimmer here from now on. I've broken two of them by always having them on the floor - no more! I'm also considering investing in a Tonic cutter at some point, so having a surface to keep it on will be critical.

The drawers are the perfect depth for punches, so I envision the left side being my punching station. All of my SU stamp sets are on the right - current favorite sets on top, then backgrounds, then sentiment sets, and so on.

The drawers are deep enough that you can stack three sets up. But I think that will make it harder to find sets I'm looking for, so I'm trying to only stack them two high. If you look closely you'll notice it isn't completely full. Wink, wink. (In all honesty I am trying NOT to shop right now, and actually to use up the stuff I've already bought!)

Here's another set of drawers that I'd gotten earlier at Costco. Ben helped me put this together, believe it or not! Since this one has the mesh drawers that I didn't spring for on the Elfa unit, it's great for all my smaller stuff. This is my heat gun station, so the top drawer holds all my EP, Versamark, glitter, etc. Then I have drawers for coloring tools, rub-ons, scissors, and adhesive. So far this is working really well for getting stuff put away when I'm done using it. That's what I need to achieve with my paper, ink and stamps - if I can do that, then I should be able to keep my stamping table clean!

Speaking of which, it's not presentable yet so these photos are all you're getting for now. There is still a whole lot of clutter in the room so it's far from done, but I was so excited about the progress so far that I just had to share. I'll have to post on update on how it's all working when I get a chance to really try out the new system.

Wednesday, February 27, 2008

Quick posting of family news

I have been very stamping-focused here lately so just thought I'd do a quick post to catch everyone up on the rest of our lives.

Todd and the kids all have colds - so far I have escaped. Ben and Sarah are cranky messes and Todd just feels blech. Y'all know that life goes on even when Mommy gets sick so I hope I can avoid this bug!

My TMJ at this point does not seem to have improved with the Botox. Or maybe something else is going on - I have a suspicion that the muscle relaxants I take at night are not as effective as they once were. But I can't get in to see my doctor until March 14. I'm on the hunt for a chiropractor and have a couple names to pursue. I also signed up for the mindfulness stress reduction course (I'll be calling it MSRC) that the pain psychologist told me about last week. I really need something to help, since I'm quite miserable at this point.

My sweet little niece Hannah, who is now four months old and has hypoplastic left heart syndrome, is going in for her second heart surgery tomorrow. She outgrew her shunt from the first surgery sooner than expected so she's having this procedure a few months earlier than planned. Most babies are at least six months when they have this procedure so Hannah is one of the youngest they've ever done. But the doctors are confident that she's ready. I know that any and all prayers and good wishes would be welcome. She can't have any feedings after 4 a.m. but surgery won't be till 12-1 p.m. so it could be a loooooooong morning.

Inspiration Challenge #10: Sapporo Table Linens


Welcome to today's inspiration challenge! The piece I chose for this week is the Sapporo Table Linens from Crate and Barrel. You can click the link to see the original. I apologize that I was unable to get a better photo of the catalog page, and that I'd already written on it before I remembered that Crate and Barrel doesn't allow its photos to be saved.

Since these linens seem to have a Japanese influence, I decided to use my Embrace Life stamps. The colors I chose are really rust, brocade blue, and certainly celery.

I tried a few new things with this card. First, the coloring: I stamped the flowers on celery in the rust and blue. I didn't want to use a neutral cardstock but I also wanted the flowers to have only a hint of green. So I used sponge daubers to color them in, putting the most color in the center and then gradually using less as I worked out toward the edge. It was tricky getting the right balance between hiding the green and letting the stamped image show through. But I really like the end result.

The leaves were stamped with celery ink on celery cardstock and then cut out using paper snips and a craft knife. Whew, this was fussy! I'm not sure if I'd do this again. But I really wanted to have green leaves on a rust background and I couldn't think of any other way to make them show up. I'd welcome suggestions if there's a technique that I'm not aware of!

I attached the leaves and flowers to rust cardstock with Tombow mono multi and then cut around it. It's mounted on brocade blue, and both panels are fingernail distressed and edged in cranberry crisp. I had intended to work that color into the card but it didn't fit once I'd finished everything else. I think it looks good for the edging, though.

The background is from Boho Backgrounds - I liked how it mirrored the smaller flowers in the inspiration piece. It's stamped in rust on a celery card. Tip of the Day: I had trimmed this stamp by cutting a zigzag pattern around the circles, and since I had done that, it was super easy to line up the stamp for the background. The zigzags lined up perfectly against the image I'd just stamped.

I knew the sentiment for this had to be pretty simple and small. I chose the "thank you" from Short and Sweet and stamped in rust on celery, then punched out with my oval punch. The brocade blue oval went behind it and then I attached two copper vintage brads. I punched a 1/16" hole right at the tip of the smaller oval on each side, and that allowed me to line up the brads perfectly. The ovals are slightly distressed and edged as well.

If you play along with this challenge, and I hope you will, leave me a comment so we all can see! Keyword for uploading at SCS is DSIC10. Have a great day!

Tuesday, February 26, 2008

I couldn't resist

Today was the opposite of last Tuesday - I wasn't planning on doing the color combo challenge today because I really should be working. Really. But of course I had to look at what the combo was - river rock, whisper white, and basic black. Ooh. Wow. Then I thought, no, I can skip it. Really. But then I went and looked at the gallery of cards people had already done and thought, nope, I can't skip it. I have to do this one! So here is my card. I had so much fun doing this one.

First I chose some river rock paper out of the Ginger Blossom collection. I had the idea to cut the paper panel in thirds today, just so it wouldn't look completely like yesterday's paper panels. It was a little tricky, though. Using the dots helped - I first cut it into what the finished size would be for a full panel (in this case, 4" x 5 1/4"). Then I counted the columns of dots and realized that eight columns for each strip would be just about the right width. So that worked out really well! I laid the strips down on the black panel before attaching to be sure I was getting them right where I wanted. The corners were punched with my ticket corner punch.

Next, the frame. I love how this turned out. These colors seemed to call out for a wedding card (check the gallery, you'll see a lot of them!) and I really love this new set called To Have and To Hold. I had the idea to stamp the couple inside an oval window and then frame it out. I stamped the couple in black and then using my blender pen, added some river rock to accent the lines and color in the flowers and bow tie. I stamped the allover flowers on the river rock and then cut my frame to size - but here's my Tip of the Day. Cut the frame first and then do the flowers. My random pattern didn't look right once the small frame was cut out. It looked much better once I turned the frame over and stamped the flowers again, turning the stamp as I went so that the flowers and swirls were evenly distributed. I punched the corners, used a larger oval punch for the couple and attached to the back of the frame with regular tape, layered it onto black, and added black vintage brads in the corners.

The sentiment and frame are stamped in black, with a little bit of river rock coloring inside the frame. I cut it out, layered on black and cut out again. Then I mounted the frame with dimensionals and the sentiment over top with foam tape, using a double layer on the right side so that it would pop up over the frame.

That upper right corner just didn't look done, so for the final touch I stamped the flower from One of a Kind and punched it out, then layered it onto the same flower just punched from black cardstock. I colored it with my blender pen and river rock ink, then put a little ribbon behind it and attached it all with another brad.

OK, now I have to work - really!!

Monday, February 25, 2008

Mix it up, baby!


Today's challenge on SCS: to mix up at least two different patterns of designer paper. Not hard for me, LOL! I must have had ESP last night since the last thing I did before going to bed was pull some of my Ginger Blossom papers to try my hand at Jen del Muro's latest Sketch for You to Try. I see these every Saturday but this was the first time I actually got to play!

I really love these papers - and can't believe that this is the first I've actually used them. It was so easy to find three coordinating prints that I liked using a collection from SU. The one catch is that I knew I was going to need to use ruby red ink, which I only have in a craft stampin' spot - so I went with embossing. Using the magnolia stamp from Embrace Life, I stamped it on river rock cardstock and then embossed with iridescent ice EP. To color it in, I took a well-used blender pen and just dabbed it directly onto the spot and then colored inside the embossed lines. I embossed the sentiment (from All Holidays) on the guava paper with the same ink and powder.

The largest background layer is guava, mounted on another panel of printed paper. My two small paper panels are 1 3/4" x 3 3/4" with 2" x 4" river rock layers underneath. I punched the flower and the ruby red and guava layers with my Marvy punches. Then I sponged all the edges in river rock and rounded the corners with my EK Success scallop corner punch. For finishing touches I added the guava ribbon, mounted all the layers onto the river rock card, and then added the flower with dimensionals. I really like this one - especially how all the different patterns work together. See, nothing to be scared of!

Sunday, February 24, 2008

I bow before you, Mary Jo

Today's featured stamper on SCS was the great Mary Jo Albright of the fabulous blog beauty lies within, which I read daily and love! The card I chose to CASE was this wonderful baby card. And now I remember why I usually don't put this much detail into my cards - this was really tough! I feel like I've been working on it for six hours. I guess it really took more like three. Egads! But I do love how it turned out. And I have renewed respect for Mary Jo and all you stampers out there who do this much work to make your cards look so gorgeous!

The changes I made should be pretty obvious. I do have all the stuff that Mary Jo used for her card, but I am all out of going gray cardstock, so I decided to go a totally different route. I decided to stick with the jumbo wheel panel, and I chose my Leaves a la Carte wheel since I thought the flower would make a nice medallion in the upper left corner. But then in order to use the large stamp from Carte Postale, I had to make it a standard size card instead of square.

I went with green again - this time mellow moss and always artichoke, which has to be one of my favorite combos. I love the moss taffeta ribbon so I think that's what actually led me to use it today. I wanted a light color to set off the green, and I chose blush blossom - a color I'm not sure I've ever used. I don't even have the ink and I only have the cardstock because I got the soft subtles pack with my starter kit. But I really love it here! I had to do my own scallop strips around the stamped panel instead of using a punch, since I had changed the shape. The focal stamps are done in always artichoke.

Otherwise I think I kept a lot the same - everything is edged in mellow moss. The faux stitching is paper piercing with stitches drawn with white gel pen. I did my embossing with Versamark and clear EP, and I chose these gorgeous Delish brads that I've been hoarding. The flower is punched out with the 1 1/4" circle punch. I was trying to add more layers to the flower but in the end simplicity won out in this corner. That's my general rule: if I'm trying too hard to make something work, then I pull back and usually find the solution.

Saturday, February 23, 2008

Too much inspiration!

The inspiration challenge over at SCS today was such a cool piece - lots of possibilities. My head was spinning with ideas but I only had time to do one card right now. I really need to start my next freelance project. Maybe I can catch up later...

I took my inspiration from the two green and ivory pillows on the left side of the photo. I liked the idea of a row of medallions over some kind of swirl or flourish. And then I realized that if I did flourishes then it also qualified for the Stamp Simply challenge from Sharon Johnson. I always like multitasking!

I looked through all my stamps and settled on the retired Stippled Stencils set and the Baroque Motifs flourish background. The stencil background is stamped with certainly celery, stamped off once first, and then the flower stamped in old olive. I cut out the stencils and the celery squares with deckle-edge scissors from Fiskars. I stamped the flourish in olive ink on olive cardstock and then sized the panel so that I would have room for the sentiment (by Hero Arts, stamped in olive) on the vanilla layer underneath. I don't think I've ever done this before - it felt like both an "Aha!" and a "Duh!" moment! I put another celery and olive layer underneath and attached wide celery grosgrain and narrow artichoke grosgrain (I think the artichoke ribbon looks great with old olive, actually) and mounted the stencil squares with dimensionals, then put it all onto a vanilla card. I actually meant to dirty up the edges and/or use a corner punch but I started putting it together and then remembered those things. Oops! Next time.

Friday, February 22, 2008

Stampin' the blahs away

It's one of those days that just feels like I'm slogging through mud and can't do anything - it's snowing outside, I'm kinda dragging from the Botox and/or a little immune reaction to it, or something... Todd took Ben down to the basement to play for a while so I decided I'd tackle a challenge or two.

This card is for two challenges: Beate's weekend sketch challenge (click here) and the SCS limited supply challenge, which is always one of my favorites. The sketch seemed like one that could really make a pretty piece of paper shine, and I've been hoarding this Cosmo Cricket Dutch Girl collection for a while now. It was so hard to actually cut into it! I chose the strip piece for the large square and then liked how the red looked behind it. I cut the strip panel small enough that some of the red pattern would show.

The flower from One of a Kind was stamped onto the blue solid from this collection, first in real red and then in river rock, and then I cut out the two largest portions to layer together. I also stamped the three small flowers in red on the same paper and punched them out, with the six-point flower as the center of the large flower. It's all mounted on dimensionals on a large Marvy scallop circle in yet another print from this gorgeous collection. The LSC for today was to use handwriting, and while I think I have nice writing, I didn't trust myself to overdo it. I went with "Mom" written in red Sharpie on a section of the strip paper, then punched out (along with the red) with my SU oval punches and mounted with dimensionals. A little organdy ribbon goes around the strip panel, which is again mounted with dimensionals. To dress up the red panel I scalloped one edge with my corner rounder punch and then let more of the pattern show by offsetting the strip panel more toward the top left corner. It all went onto a white card that will say "Happy Mother's Day" inside. (Yes, you will be seeing Mother's Day cards a lot here, since that is what I'll need for my May 7 craft fair!)

Wednesday, February 20, 2008

I've had quite a morning

I took the plunge and got the Botox injections this morning. The anesthetic injections I got on Feb. 4 did end up helping noticeably - I could eat more foods, sing a hymn in church without pain, etc. So I felt like I really needed to give the Botox a try. But I mean, ouch. It hurt even worse than the last ones because he had to go in twice on each side. I hyperventilated and got light-headed and had to lie down. Not fun.

After that I had an appointment with the pain clinic's pain psychologist. I didn't really know what to expect but the insurance covers seeing her so I figured I had nothing to lose. It ended up being an incredible experience. She did an experiment with me hooked up to a heart monitor. It registered my heart rate on her computer and was looking at something she called heart-mind coherence - this was new to me and I'm not sure I fully understand it, but she said that my coherence was very low, which is normal. Then she had me close my eyes and she took me through a deep breathing exercise, visualizing the breath going out through my feet, legs, etc. When she got to the heart, it triggered something and tears just started streaming down my cheeks. I told her I was OK to go on, so she had me really focus on slowing my breathing by using a count (five counts in, five counts out). Then she had me stop and look at the computer. She showed me how my coherence was going up at the beginning of the exercise, and at the point when she first got to the heart it was all the way at the top of the scale. But then it went all the way down, at the point when I was crying. As I was doing the counting and breathing it was on its way up again. I admit, I was skeptical of what any sort of mind-body work would really do for me. But seeing it there on the computer completely took that away. It was amazing.

We talked some more after that about what she thinks I should do. She said that my jaw is holding all of my tension because that is "my place" - meaning that with singing that is where my energy comes out, and with stress that is where the energy is held. She recommends that I do their mindfulness stress reduction course, which involves meditation and light yoga. If I can find the time and the money ($350) I think I will do it. After all of this I'm feeling a little more hopeful today.

Inspiration Challenge #9: Pier 1 flyer


When I came across this flyer from Pier 1 in last Sunday's newspaper, I think I gasped. I knew I needed to use it for this week's challenge.

But you know how sometimes you have a great idea and you just can't make it work out like you envisioned? I tried two cards for this and I don't love either one. I just couldn't make the cards come out like the picture in my head. But I hope you'll play along - I'd love to see what you come up with! Here's a keyword for SCS: DSIC9

The first card started out fine. I stamped the gorgeous Pretty Petals background in summer sun. Then I stamped the butterflies (stamp by Inkadinkado) in basic black on a whisper white scrap and colored with my blender pen and brilliant blue, bashful blue, basic black and summer sun ink pads. On the yellow butterfly I added some white dots with a gel pen. I cut out the wings and bodies, then stamped the butterflies in black again directly on the background and mounted the colored ones with dimensionals. Since they were colored they curled up a little on their own, which I think looks cool!

This is when I got stuck. I knew I wanted a brilliant blue panel behind it and it seemed to need something in that lower right corner, but I just couldn't make anything look right. In the end I stamped a Hero Arts sentiment, colored with Tombow markers so I could do the flower in lighter blue, and punched out with my circle and scallop punches. I added a bit of bashful blue taffeta ribbon to try to dress it up a bit.

The second card was a CASE of my own card I did a few weeks ago for the featured stamper challenge. I stamped the butterfly from Priceless in bashful blue on bashful blue cardstock, stamping off once first. I used my So Swirly wheel and rolled over my summer sun inkpad - Beate does this all the time and I admit, I was skeptical, but hallelujah, it really works! I should have known not to doubt her. I cut the scallop panel out of brilliant blue with my slit punch. I sponged the edges in brilliant blue, added the sentiment from All Holidays, and then mounted another butterfly in brilliant blue with dimensionals. I used my 1 3/8" SU circle punch and then two Marvy punches. The ribbon is again the bashful blue taffeta. I like this one better than the first, but still... somehow it wasn't what I envisioned. Oh well!

Tuesday, February 19, 2008

Well, this WAS a challenge

I told myself that no matter what, even though I have freelancing work piling up and lots more cleaning to do, I was going to do the SCS color challenge today. Emily picked a doozy - orchid opulence, pumpkin pie, and certainly celery. I wasn't too sure about these colors together but in the end I think it worked pretty well for this card.

I knew I had DP in both celery and pumpkin pie - the monochromatic pack in celery and the pumpkin in the Bali Breeze collection. I decided to use the Fan Club monthly sketch challenge for the layout. (You should definitely join the Fan Club if you haven't already!) I also thought that the new Sale-a-Bration set called Friendship Blooms would be the perfect set for these funky colors. I decided to use a large piece of celery DP for the background, since that is my favorite of the three colors, LOL. Then I cut the piece of pumpkin paper and layered on top two orchid strips that were stamped in Versamark. I added the celery ribbon around the panel. The main flower is stamped in orchid, then masked off for the leaves to be stamped in celery. I used my blender pen to fill in the leaves and add orange accents to the flower. After I cut it out I thought it needed something else so I put an orchid scallop punch behind the cut out and mounted on dimensionals. I stamped the sentiment onto the celery paper and then added three cut flowers on dimensionals. It was pretty quick and easy, and I like it a lot more than I thought I would!

Saturday, February 16, 2008

Bonus Sunday Challenge #2: Old Habits Are Hard to Break...

but let's see if we can move out of our comfort zones a little with this challenge! (I'm posting early just in case tomorrow is crazy and I don't get the opportunity, and you subscribers might actually get this emailed to you in the morning!)

My idea for this challenge came from the card I made for the swap I attended today. We were instructed to keep the cards fairly simple - so that they could be made in 8 minutes or less. We were supposed to use no more than two layers, including the card. Gasp! Is that even possible? ;) It was definitely a challenge for me to keep it down to that. I'm not sure my card completely qualifies, but I know I would have added at least one more layer.

The challenge, then, is this: do two things differently than you normally would. It could be a limited supplies challenge, if you use fewer layers, or it could be colors you wouldn't normally use, or anything else you can think of. My second deviation from normal is a little one, but is something I've noticed in my cards lately. I often seem to put the sentiment in the lower right corner. I don't know why - it just ends up there. So this time it's on the left. Anyway, I'm sure the list of possibilities is endless.

And now for my card. I wanted to use something new, and something that didn't seem quite as popular. I was thinking that I hadn't seen many cards using Stitched Exotics yet. Sure enough, there were only 32 in the SCS gallery when I looked. To be honest I find this set a little hard to work with, but I do like the images so I'm going to keep playing with it. For this card I stamped the main flower in taken with teal on a white strip, then stamped the swirls in old olive on either side. I mounted it to a background panel from the Bali Breeze collection (love this paper so much). As a border I tied a piece of wide old olive ribbon across the bottom of the white panel. I have to add that I found it so amusing that my knot on this card led to my giving knot-tying tutorials to three different people today! I hope it was helpful. The sentiment is from Bitty Birthday and fits perfectly in the small oval punch. Then I put it onto a larger teal oval and adhered to the ribbon with a glue line. That's it!

Hope you'll play this challenge with me - if you upload to SCS you can use the keyword DSBSC2. Have fun pushing the envelope!

Report from my first shoebox swap!

I had a great time meeting up with eleven wonderful stampin' ladies today. I knew three already - my upline and another team member, and one from the Christmas card club at our LSS - but it was so great meeting all the others and working on some really fun cards. I decided to try out my first slideshow to showcase the cards I made today, so here they are:

I got to try some new things today. The only thing I'm not happy with is I didn't do such a good job on the pirate crayon resist card. I'll have to try this technique again now that I've learned a thing or two. There is one card that I had to change - it was the last one I did, one of the supplies I needed seemed to have run out, everyone else was finished and cleaning up, and when I got home I didn't have the same stuff, blah blah blah. So if the lovely person who made this card happens to see, I hope you like what I did with your wonderful idea!

My swap card will be coming in its own post, along with that challenge I promised, either later tonight or first thing tomorrow!

Friday, February 15, 2008

Sarah says hi

Too cute not to share!

Oh how I love the Container Store!

I mentioned yesterday that I was going to be heading there this morning. Well....... I got myself a nice little birthday present (in advance). I was just browsing their rows upon rows of organizing stuff, thinking I'd get some containers and such, and as usual I let my eye wander over the Elfa closet systems that they sell. How I would swoon if I could have a closet like that... but then I noticed that they had some small units with metal drawers that looked just the right depth for punches and a melamine top that would make a great additional work surface. (After breaking two paper trimmers I really need to get them up off the floor!) I ended up getting four units of this one so that they'll be stacked 2 x 2 and have twice the work surface area and be at counter height. (I got all my drawers with a depth like the top one - it seemed like stuff would just get buried in the deeper drawers.) I couldn't believe how excited I was about this. I really feel like this will change my stamping habits in such an amazing way! Now I just need to clean up the rest of the room so I have a place to put it together and can decide where it should go. Hopefully those pics will come soon, if I get some cleaning time this weekend!

Tomorrow I'll be at a local card shoebox swap all day so I don't expect to post, but I'll be back on Sunday for a special Sunday Bonus Challenge using my swap card. Hope you'll come take a peek!

Thursday, February 14, 2008

Stamps for sale!

In my quest to organize my stamping space I've decided it's finally time to sell the sets I'm not using. I've added a link at the top of the sidebar - if you click there it will take you to my listing on SCS. I will update the post there as sets are sold. Any questions, ask away!

Happy Valentine's Day!

No time for stamping here today. My post-craft fair project: cleaning and (re)organizing my stamping space. The (re) is both in the sense of putting everything back where it belongs and finding new places for things that just can't seem to make it back to where they've been living recently. I think tomorrow a field trip to the Container Store is in order. Love that place! I need something for my punches. The two ideas I've seen - using a hanging shoe bag or hanging them on the wall - won't work in my space. I need something better than a cardboard box.

I thought it might be fun to share our organizing tips, favorite products that help us stay organized, etc. One thing I've made good use of is those plastic containers that lots of things come in at Trader Joe's. They have lids, and are in great sizes for storing various things. I use them mostly for ribbon, adhesive, and embellishments. The other thing I've realized is that a big problem for me is putting things back when I'm done with them. I tend to leave them on the table, and then my stamping space gets gradually smaller and smaller until I have about a six-inch square to work with. Seriously. But it vastly helps me to store things close to my stamping table - I'm much more likely to put them away then. So now I need to figure out how to get my stamps, ink pads, ribbon, and cardstock/papers all in places where they're more organized and accessible. Wish me luck! I'm not brave enough to post before pics - my mom reads this, after all - but I'll post after pics and share if I find anything that works really well!

Wednesday, February 13, 2008

This wasn't quite what I expected...

The craft fair today was nearly a bust! I couldn't believe it, after how hard I worked getting ready the last two weeks. The weather overnight was snow then sleet and then lots of rain (which has now resulted in water in our basement for the first time, ugh) so a lot of schools were closed, plus at this company the work is very flexible and lots of employees have the option of working at home. I can't blame them, since I would probably do the same, but man! I'm trying to look on the bright side, since (1) most of my Valentine stuff can be saved for another year, and the non-Valentine stuff for the May fair (and then snow shouldn't be a problem, I hope!) and (2) since the cost was a percentage of sales, it hardly cost me anything to be there. And one person seemed like a potential SU customer, and besides, getting my name out is never a bad thing.

Just for fun I thought I'd quickly share a few of the non-card projects I was working on, since I never had time before. (Incidentally, none of these sold at all today!) These mailboxes were one of my favorite things I made. These are the mailboxes from the Target $1 spot. Inside each one is a little stuffed dog also from the $1 spot - they came in a pair, one pink and one white, so I just separated them and made mailboxes to match - and then the matching 3x3 card and a tiny bag of M&M's. The brown and pink papers are by Pebbles - I found them on our trip in that huge Memphis store and I can't find them anywhere else - love them! The black paper with white dots is Doodlebug and the white with black is Imaginisce. I picked up the brown ribbon and the black with white dots at JoAnn's - why does SU not have chocolate chip narrow grosgrain? Stamps by Stampendous and My Sentiments Exactly.

One of the blogs I've recently started following is Dannie's Designs. She has the cutest stuff! I got the idea for these heart tins from her blog. The sides are wrapped with paper attached with sticky tape, and ribbon tied around the top. I loved using the new rub-ons on the tops! I also love the one on the top left. To get the heart, I took one tin that was messed up - silly me, I tried to use a non-SU rub-on and it didn't work! - and cut out the plastic in the lid, then traced the shape and cut out before stamping. I used the One of a Kind set and my Boho Blossoms punch. I stamped the flowers with chocolate chip on the solid pink paper from Berry Bliss and then punched out.

Here's my last project for today - not a Valentine's project, but still really cute! This was also shown on Dannie's blog. No stamping here - just some of our gorgeous SU papers. Sorry this isn't a better photo but I was in a hurry! I got plain 4" coasters from Stamponthis.com, covered with Mod Podge, then applied a 4" square of paper (with corners rounded). I picked a Post-It Note pad that went with the paper, then used Mod Podge to cover the medium-size binder clip in a coordinating paper and added a ribbon bow. I even managed to find tiny pens at Staples - they are mini gel pens and come in black and several colors. People seemed to think they were cute, so hopefully they will sell in May. We'll see!

Friday, February 8, 2008

Well, whaddya know.

My jaw actually hurts less - could it be that those shots had some effect? I guess the pain of injections would be worth some overall relief. I'm going to keep monitoring how I feel over the weekend and call the pain clinic doctor on Monday. It sounds like Botox could possibly be covered by insurance, so it may be that we try one round and see how it goes. I could also get chiropractic treatment covered by insurance, so I at least have one more affordable option to pursue before I start feeling desperate. Stay tuned...

Wednesday, February 6, 2008

So many valentines

That's what I'm trying to make today! I managed to do a quickie one that fit the SCS sketch challenge for today so I'll do a write-up - hopefully as quickly as I made the card!

The focal image here is a stamp from SU's So Many Sayings. I flipped the sketch in order to use this stamp. I had to partially ink and stamp the image twice to avoid stamping the one that says "missing you" - I used the edge of the paper to line the stamp up and thankfully it worked on the first try! Everything is real red - the dot paper comes from the 6x6 hostess pack and the ribbon is the new striped ribbon that I couldn't wait to use. I taped the ribbon onto the back of the white panel and then used foam tape to attach the stamped panel. With the tape going all the way across it holds down the ribbon without it having to be glued down. I'll stamp Happy Valentine's Day in the inside and call this one done!

TIP OF THE DAY: If you accidentally turn your real red stamp pad upside down while it's still open, and then thinking it's closed, you slide it across your white craft table, use your refill bottle of Stampin' Mist and a paper towel and it cleans up in a jiffy. Ask me how I know...

Tuesday, February 5, 2008

Sarah's first haircut


My baby got her hair cut today for the first time! It was a spontaneous decision since Ben was getting his cut and it was slow and the lady asked me if I wanted Sarah's done, too. I've already heard the comment that she looks even more like me now - I guess we both have the same flippy thing going on on the sides, don't we? But she has such soft and fine hair, which mine is definitely not. Well, I still think she's adorable regardless. And for a first haircut she did pretty well - way better than Ben's first, but then again she has 6 months of age on him compared to when he got his first one. It helped that she got to sit on a (stationary) carousel horse, which she calls a jumping horse. And this being New England, where malls tend to have carousels, she is already familiar with the species!

An apology in advance

I am realizing that I am way behind in making stuff for this Valentine's craft fair on the 13th. I am probably being too ambitious in what I'm trying to pull together, but I just don't know (1) how much to make for a 1,750-employee-company vendor fair, and (2) what will sell well for Valentine's Day. So... here is my apology:

I will be taking a hiatus from my inspiration challenges until Feb. 20.

~and~

I will probably be blogging less often until after the craft fair and a local card swap I'm doing on the 16th. I'll try to pop in if I can do a quick post, but I really need to kick into high gear on producing lots of stuff and focus primarily on that.

My apologies, especially to all my subscribers, old and new (thank you!!) - I promise that as soon as these commitments are behind me I will be back, because I've really enjoyed being more active on the blogging scene. Thanks for reading!

Monday, February 4, 2008

Not-so-encouraging news on the TMJ front

This morning I had my consult with the doctor at the pain management center about getting Botox in my jaw. His first question was, how long have you had this, and when I said almost 20 years, he made a face and said that Botox isn't likely to work for me. He gave me an injection that they can use to test whether the Botox will have an effect - I'm supposed to monitor my pain over the next 3-4 days, and if this doesn't help, then the Botox won't, either.

His best advice was to do some kind of mind/body pain management, so I have an appointment with the pain psychologist on their staff in a couple weeks. He says I should do something for relaxation every day - I guess it's not good that my first thought was, when will I find the time? I think the most likely thing for me to try would be a yoga DVD at home. If anyone knows some good ones for a yoga beginner, please share!

I just don't know where this is going to lead if the Botox isn't an option. I would be willing to try chiropractic or acupuncture, but since my insurance won't pay for most or any of that, it'll be a real struggle to make that work financially. I guess right now it's wait and see if the injections I got this morning will help.

Oh, and in case you were wondering, getting injections into your jaw muscles reallyreallyreallyreally hurts.

Sunday, February 3, 2008

Bonus Sunday Challenge #1: 30-minute Valentines

I only had 30 minutes this morning to complete a card for the featured stamper challenge on SCS, and as I was doing it I thought it would be fun to do a bonus blog challenge. I don't expect to do these every Sunday, but whenever I feel like it. Come play! And here's a keyword for uploading on SCS: DSBSC1.

Here is the challenge: Make a Valentine's card in 30 minutes. I had to hustle with mine, especially considering that I had to choose all my materials in that time frame. So I'll make it a bit easier on you - choose your layout and materials, and then start the timer.

For my card I chose to CASE this card of Renee's. I just loved the layout! I made mine a good deal simpler to fit in the 30 minutes. I did generation stamping rather than coloring, and I used fewer colors. This is an SU only card, which made it go faster, and I also went for my favorite Valentine color combo, pretty in pink, purely pomegranate, and very vanilla. The heart stamp is from Priceless and the sentiment from Many Happy Returns. I also broke out my new So Swirly wheel for the background, with pretty in pink ink. The dirty edges were done in pomegranate. OK, I gotta go now, really!

Saturday, February 2, 2008

I love the Block Guy!

I don't remember whose blog I was reading when I found out about the Block Guy, but I'm so glad that I did! You can find his site here.

There were two stamp sets in the new SU catalog that I looked at and thought, I would totally use those if they weren't all on a single stamp. The first is the Happiness background and the second is Many Happy Returns. Well, thanks to the Block Guy, I was able to separate them and now can use them individually! I know I will get so much use out of these that it was worth spending a little more to get the new blocks. They are cut to size for each set and arrived just a couple days after I ordered. I couldn't be happier!


Here is how the two sets look when mounted this way. I really can't wait to make a baby girl card that says "tickled pink"!

I already made a card using one of these sets. I picked up this adorable cupcake stamp from Lockhart yesterday, and I didn't really think of using it for a valentine, but now that I have "sweetie cakes" it seemed perfect. The image is stamped in purely pomegranate and colored in with pretty in pink ink on a blender pen. Then I used my Versamarker, SU heat & stick powder and glitter to make them sparkly. I used my Stampendous heart stickers to cover up the cherries on top of the cupcakes so they would seem more valentine-y. The scalloped panel was done with my corner rounder punch.

For the card I took a white base and stamped the hearts from Sprinkles in pomegranate. The pink dot paper is from the hostess 6x6 paper pack. I added a strip of pomegranate ribbon before attaching the dot panel to the card. The inside is stamped with a Happy Valentine's Day stamp. I have to say I think this one turned out really cute, and finally a glittery card I'm happy with!

My first SCS challenge this week!

I can't believe today was the first day I had time to do the SCS challenge all week. I've been working hard on craft fair stuff. But today's challenge was too wonderful to pass up. The inspiration was a Swedish living room seen here.

My eye was first drawn to the medallion-like rug - and if you look at the challenge gallery (which is full of beautiful cards - wish I had time to comment today) you'll see I wasn't the only one! I chose my new One of a Kind set and used the flowers to make the medallion, which is in soft sky ink on very vanilla cardstock. I mounted over wide ivory organdy ribbon on a strip of soft sky with distressed edges.

The background paper is from the Rose Cottage scrap kit - I assembled a bunch of fronts last night but still had some that I hadn't done anything with. I really love this soft print. When it came time to do the sentiment, I knew that I wanted to stamp right onto the background, but I had intended to only use vanilla and soft sky. In the end I pulled out my favorite blue bayou for the sentiment and added another panel to balance out that color. It seems I can't help reaching for these two colors together! If I'd known I was going to use the darker color I would have layered a blue bayou strip behind the soft sky, but oh well. This was pretty easy so I may make more of this. To finish off the card I put a few more punched flowers in the lower corner and assembled it all on a vanilla card.

As a side note, I know that this stamp set isn't available right now. There are problems aligning the stamp position with the coordinating Boho Blossoms punch. I must have ordered both of these right before they pulled the stamps because I just got them on Wednesday. When I mounted the stamp, I lined up the rubber with the punch, and then applied the block over the rubber while still inside the punch. Then I just had to make the label match up to the mounting. It looks crooked, but it works!

Friday, February 1, 2008

Mass production mode

I mentioned in an earlier post how I like to cut up SU's Simply Scrappin' kits to make cards. I originally got the idea from SCS (click here) but have since modified it somewhat. I like to put together sets of six coordinating birthday, thank you, and/or friendship cards, and they have sold fairly well for me. At my upcoming fair I'll also be trying emergency card kits, where I will probably combine six cards from different kits for various occasions.

When I tackle these kits, I don't do a 6x6 scrapbook page as Amanda does. I just cut each cardstock and paper sheet into 6 card fronts (5 1/4" x 4") and 3 smaller panels (1 1/2" x 4"). Then I can mix and match the different solids and prints. I also cut the border strips into a mix of 4" and 5 1/4" lengths for both horizontal and vertical cards. I like to use these strips to dress up some of the solid card fronts. In the end I have at least 84 card fronts, and if I add some extra cardstock from my stash I can often squeeze out a few more! But I have to add in all honesty that usually I can't quite get to the end of the project before I have to go do something else. I know I have quite a few unfinished card fronts floating around...

I'm still working my way through these and finishing them off, but I thought I would share some of my favorites. These are from the retired hostess kit Creative License.

I also took the same basic principle and applied it to my retired Porcelain Prints paper, which I keep meaning to use up! (One of these deviates from the usual style of the kit cards, but I thought I'd show it anyway because I just like it.)

As if this weren't enough, I just got three more kits this week - they are cut up but I've hardly done more than that. Just as a side note, it takes me about half an hour to do all the cutting, so that's not bad - but sometimes deciding how to put the pieces together takes me quite a while!

I have to say that this process is a whole lot harder when you venture away from the SU world. I had seen the Heidi Grace Maple Crest collection at JoAnn's and just had to have it... but it was only when I got home that I realized, now I have to match cardstock to this. And ink. And ribbon. I still love these papers but it was so much more time consuming working without all the coordinating products at my fingertips. So my line as a demo would have to be... you get all this great stuff that coordinates, for a great price, and you can match it up with any number of stamp sets. You can't lose with the SU kits! ;)

TIP OF THE DAY: When doing the cutting and assembly of your SU kit cards, check before you cut that the annoying little copyright imprint on your printed paper will be hidden under one of the smaller panels when your cards are put together. I like to position that corner at the bottom left and make my first cut at the 5 1/4" mark, so that I know it will be hidden. I've figured this out the hard way!

TIP #2: I find it helpful to have as many punches as possible, and stamps that fit in them, at the ready when I'm finishing these. That way the assembly comes together much more quickly!